Social Blog Pro
Content
Introduction
WHAT IS WORDPRESS CMS?
WordPress CMS is a user-friendly content management system enabling easy creation and management of websites and digital content, regardless of technical expertise. Originally a blogging platform, it has evolved into a versatile CMS for various website types. It offers themes for visual appeal, plugins for added functionality, and a simple interface for content creation. With a responsive design and SEO-friendly features, WordPress is supported by a large community, receives regular updates, and exists in both hosted (WordPress.com) and self-hosted (WordPress.org) versions. It's renowned for its accessibility, adaptability, and open-source nature.
HELP AND SUPPORT
If you have any questions regarding our WordPress themes, you can contact us through our support forum or you can mail us at support@asterthemes.com Our support team is always ready to help you with any problems of customization or compatibility you may encounter.
Click here for support:
SUPPORTSystem Requirements
Minimum Requirements to Install:
- WordPress Version 6.2.2
- Php Version 8.1.10 (Supports 64bit values)
- MySQL Version 10.4.25-MariaDB
- WP Memory limit of 256 MB or greater
Recommended PHP configuration limits:
If you are getting any issues in importing the demo content, you need to increase PHP limits. You can do this by yourself or contact your hosting servicer provider to ask for the help to increase following PHP limits in php.ini
- max_execution_time 300
- memory_limit 512M
- post_max_size 40M
- upload_max_filesize 40M
- upload_max_size 40M
- max_input_time 60
Theme Installation
Installing a theme in WordPress is a straightforward process. There are two main methods to install a theme: through the WordPress dashboard or manually via FTP. Here's a step-by-step guide for each method:
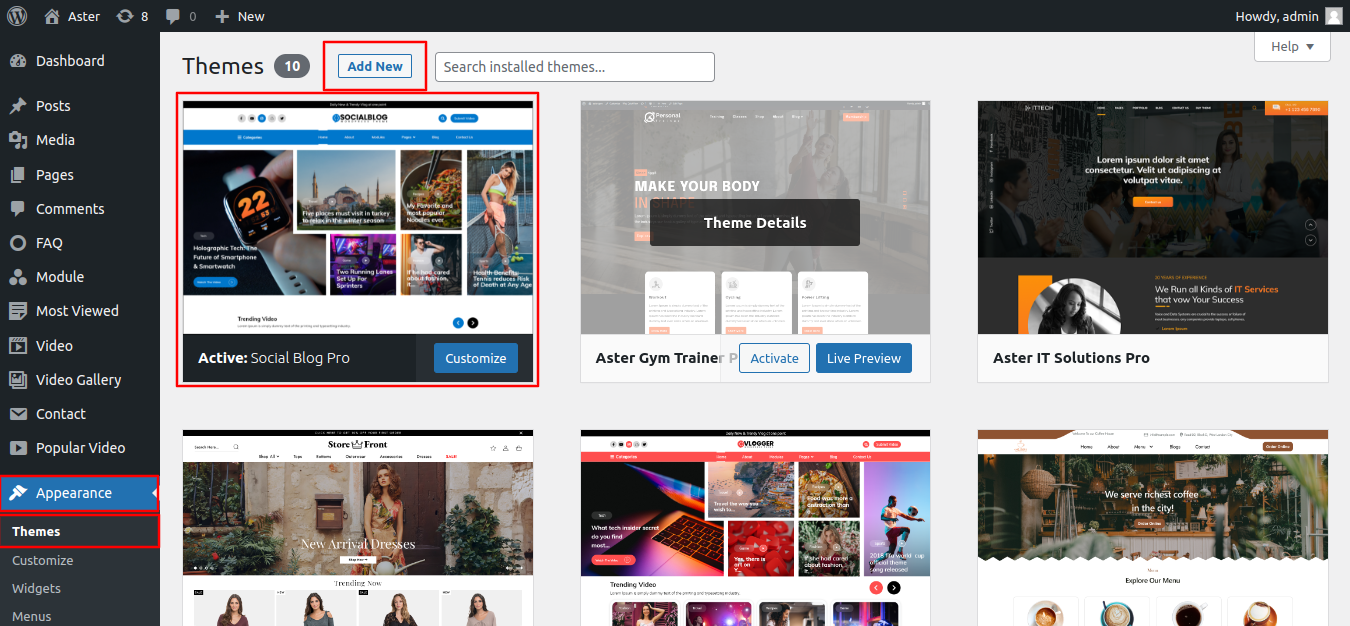
Method 1 : Installing a Theme via the WordPress Dashboard
- Go to Dashboard > Appearance in the left-hand menu, and then Click on Themes.
- Click the Add New button at the top of the Themes page.
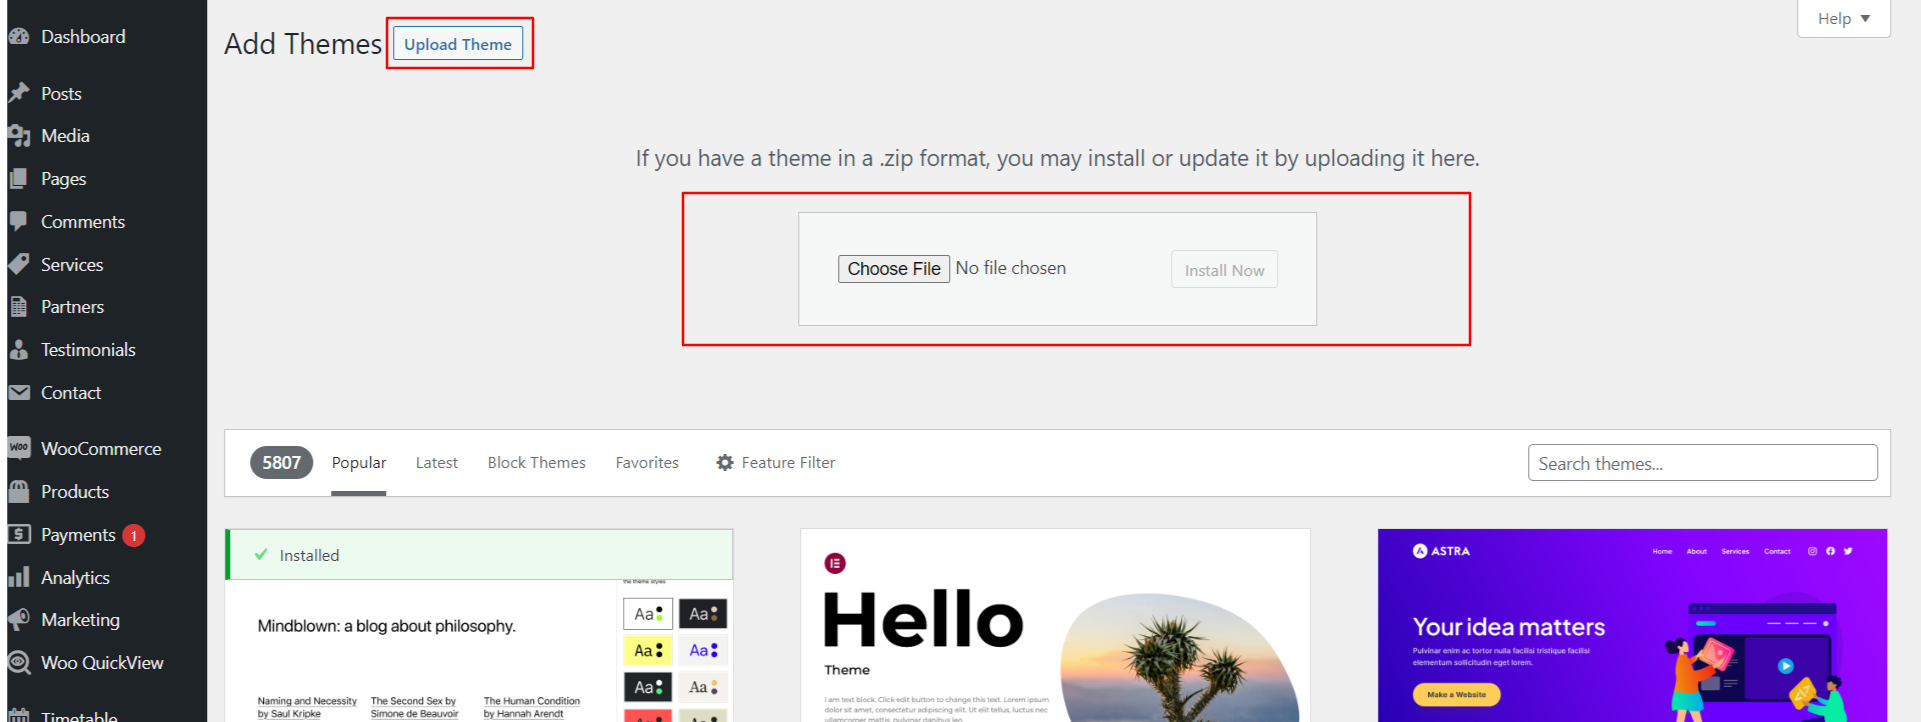
- Click the Upload Theme button if you have a theme file in ZIP format and Click on Browse for chosse file in ZIP format and then click Install Now.
- Click the "Activate" button to make the theme active on your website.
Method 2 : Manually Installing a Theme via FTP
If you know the FTP login details of the server where your site is hosted and you have a FTP client installed (such as FileZilla), you might consider using this way of uploading your theme.
- Unzip the social-blog-pro.zip file.
- Using an FTP client to access your host web server. Go to /wp-content/themes.
- Upload theme to /wp-content/themes/.
- Go to Dashboard > Appearance > Themes and activate theme from Dashboard.
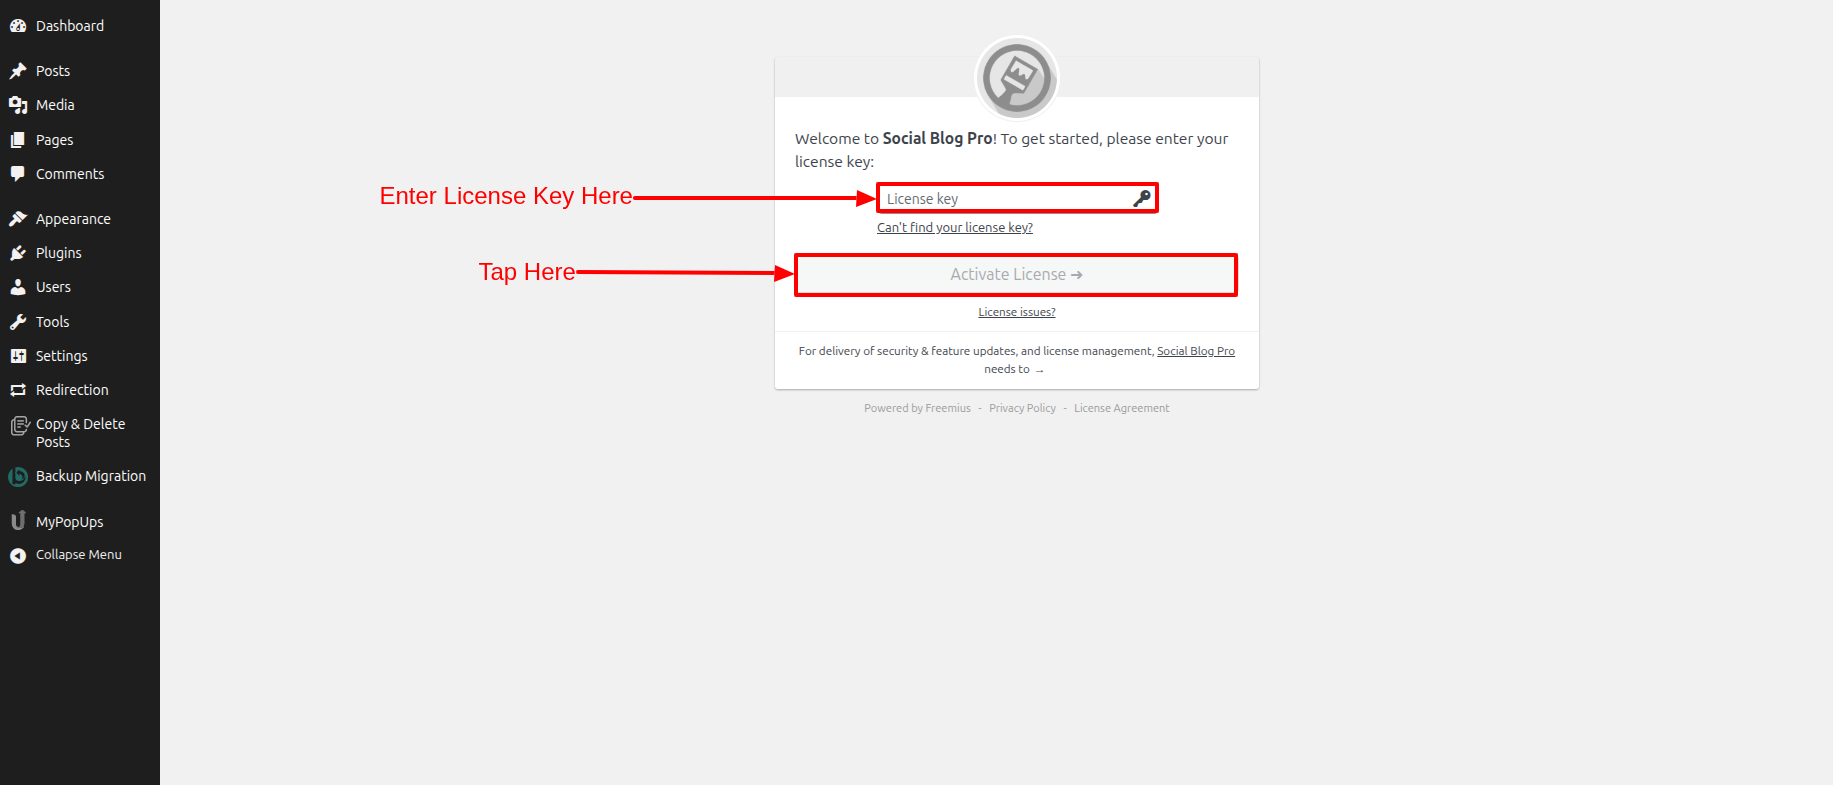
License Key
After activating the theme, you'll directly see this page. As you can see, you need to enter the License Key there, then tap to Activate License .
Demo Import
In WordPress, a demo importer is a feature commonly provided by premium themes or theme frameworks. It allows users to import demo content, layouts, and settings to replicate a pre-designed website demo.
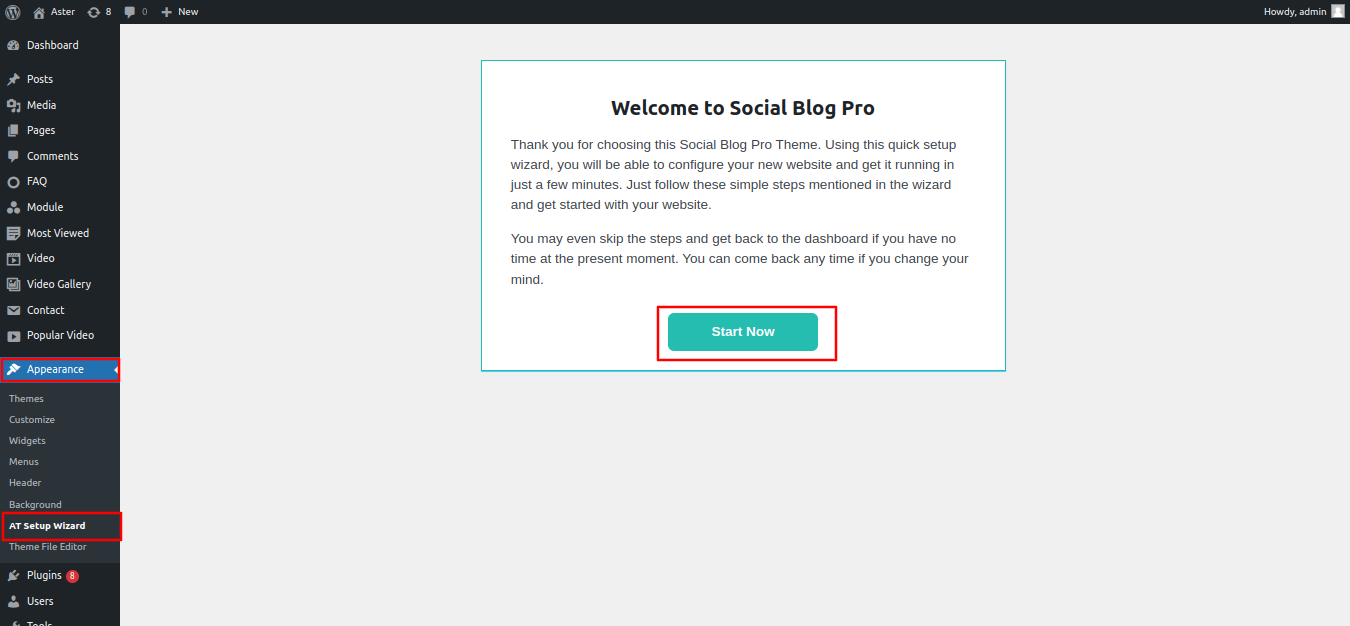
- Go to Dashboard > Appearance in the left-hand menu, and then Click on At Setup Wizard.
- Click the Start button and start your demo import.
- Click the Install Plugin install all the plugin.
- Click the Demo Import finish Demo import.
- Click the Visit Site
Plugin Installation
Installing plugins in WordPress is a simple process and can be done through the WordPress dashboard. There are thousands of plugins available to extend the functionality of your website.
Method 1 : Installing Plugins via the WordPress Dashboard (Recommended)
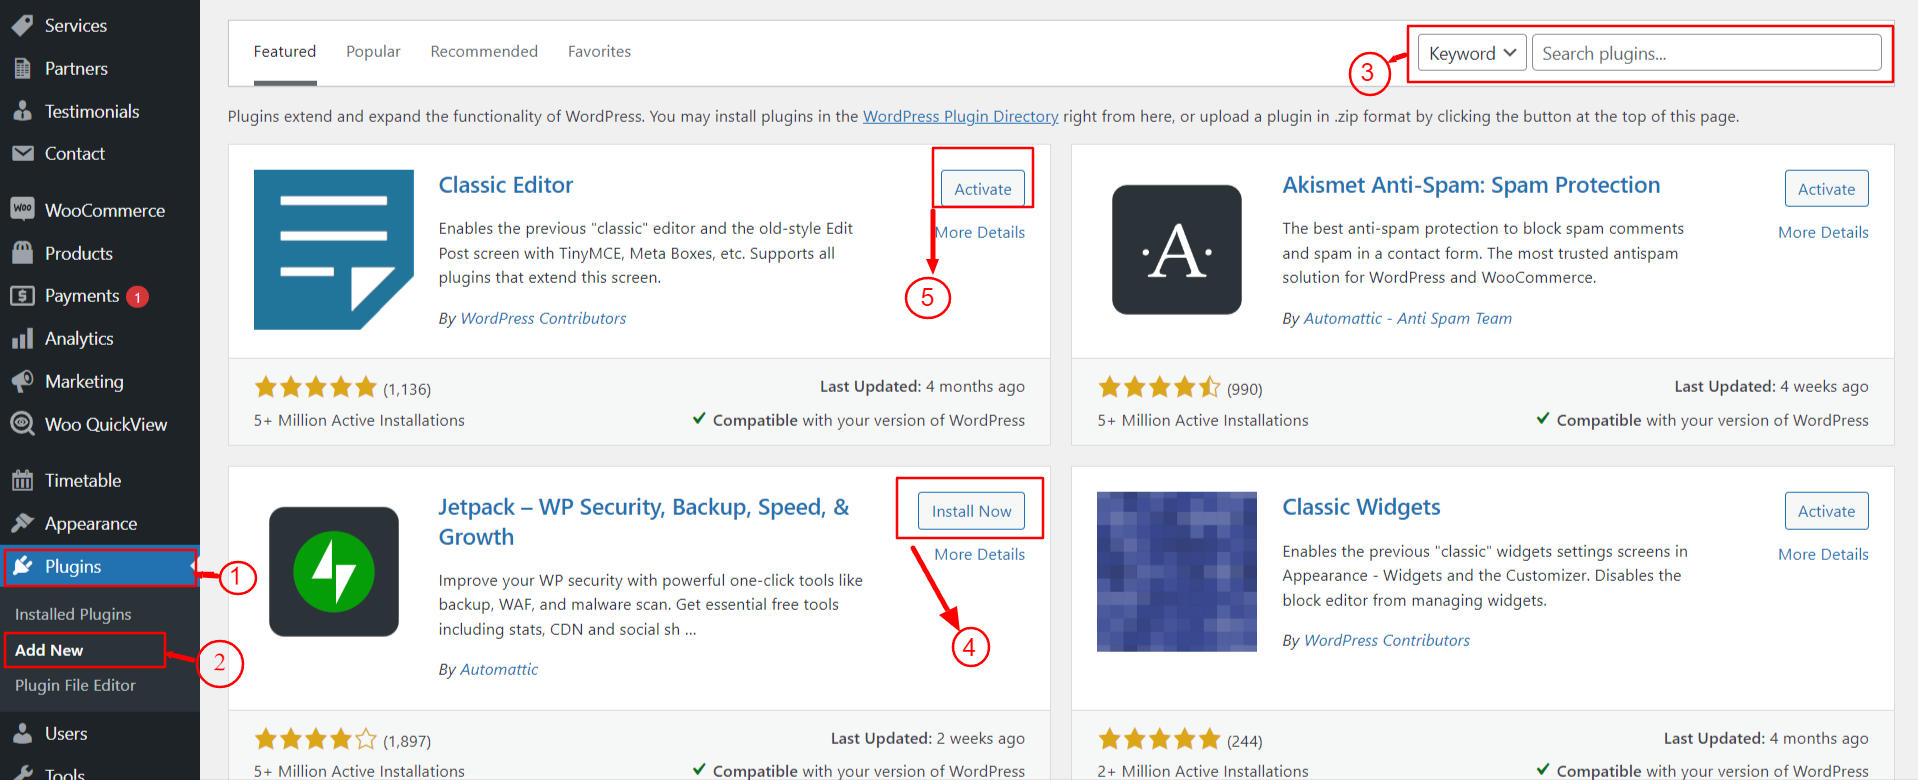
- Go to Dashboard > Plugins in the left-hand menu, and then click on Add New
- In the Add Plugins page, you can search for the plugin you want to install.
- From the search results, find the plugin you want to install and click the Install Now button next to it.
- After the installation is complete. Click the Activate button to activate the plugin and make it functional on your website
Method 2 : Uploading Plugins Manually via the WordPress Dashboard
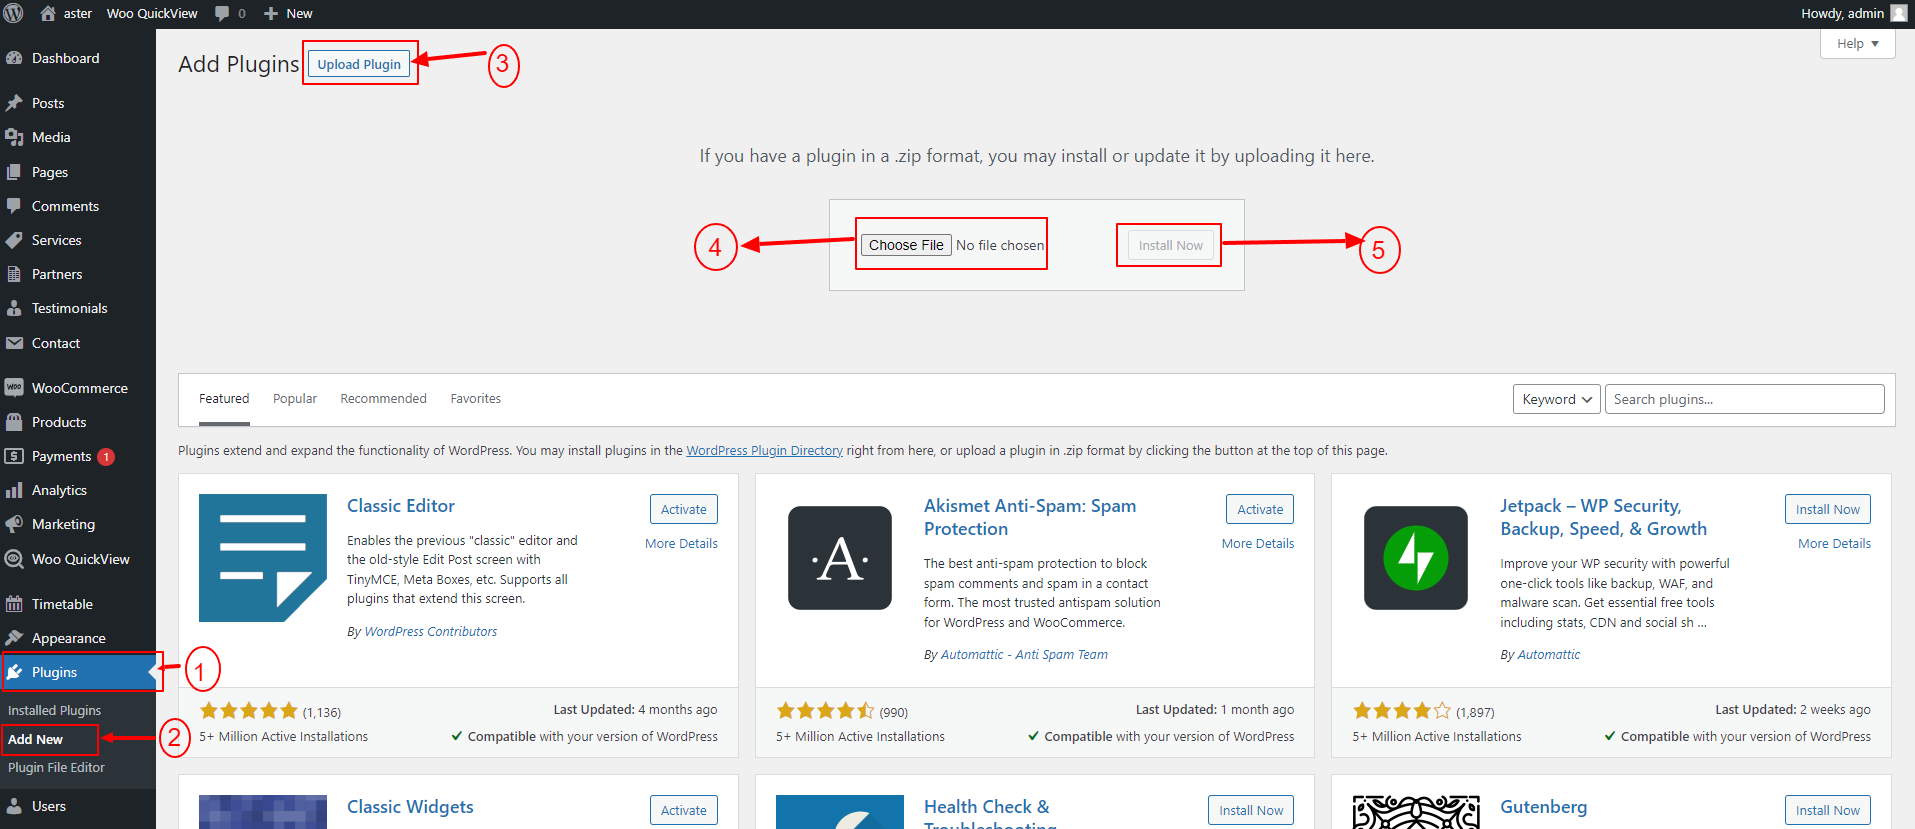
- Go to Plugins in the left-hand menu, and then click on Add New.
- Click on the Upload Plugin button at the top of the page.
- Click the Choose File button, select the plugin ZIP file from your computer, and then click Install Now
- Click the Activate Plugin link to activate the plugin on your website.
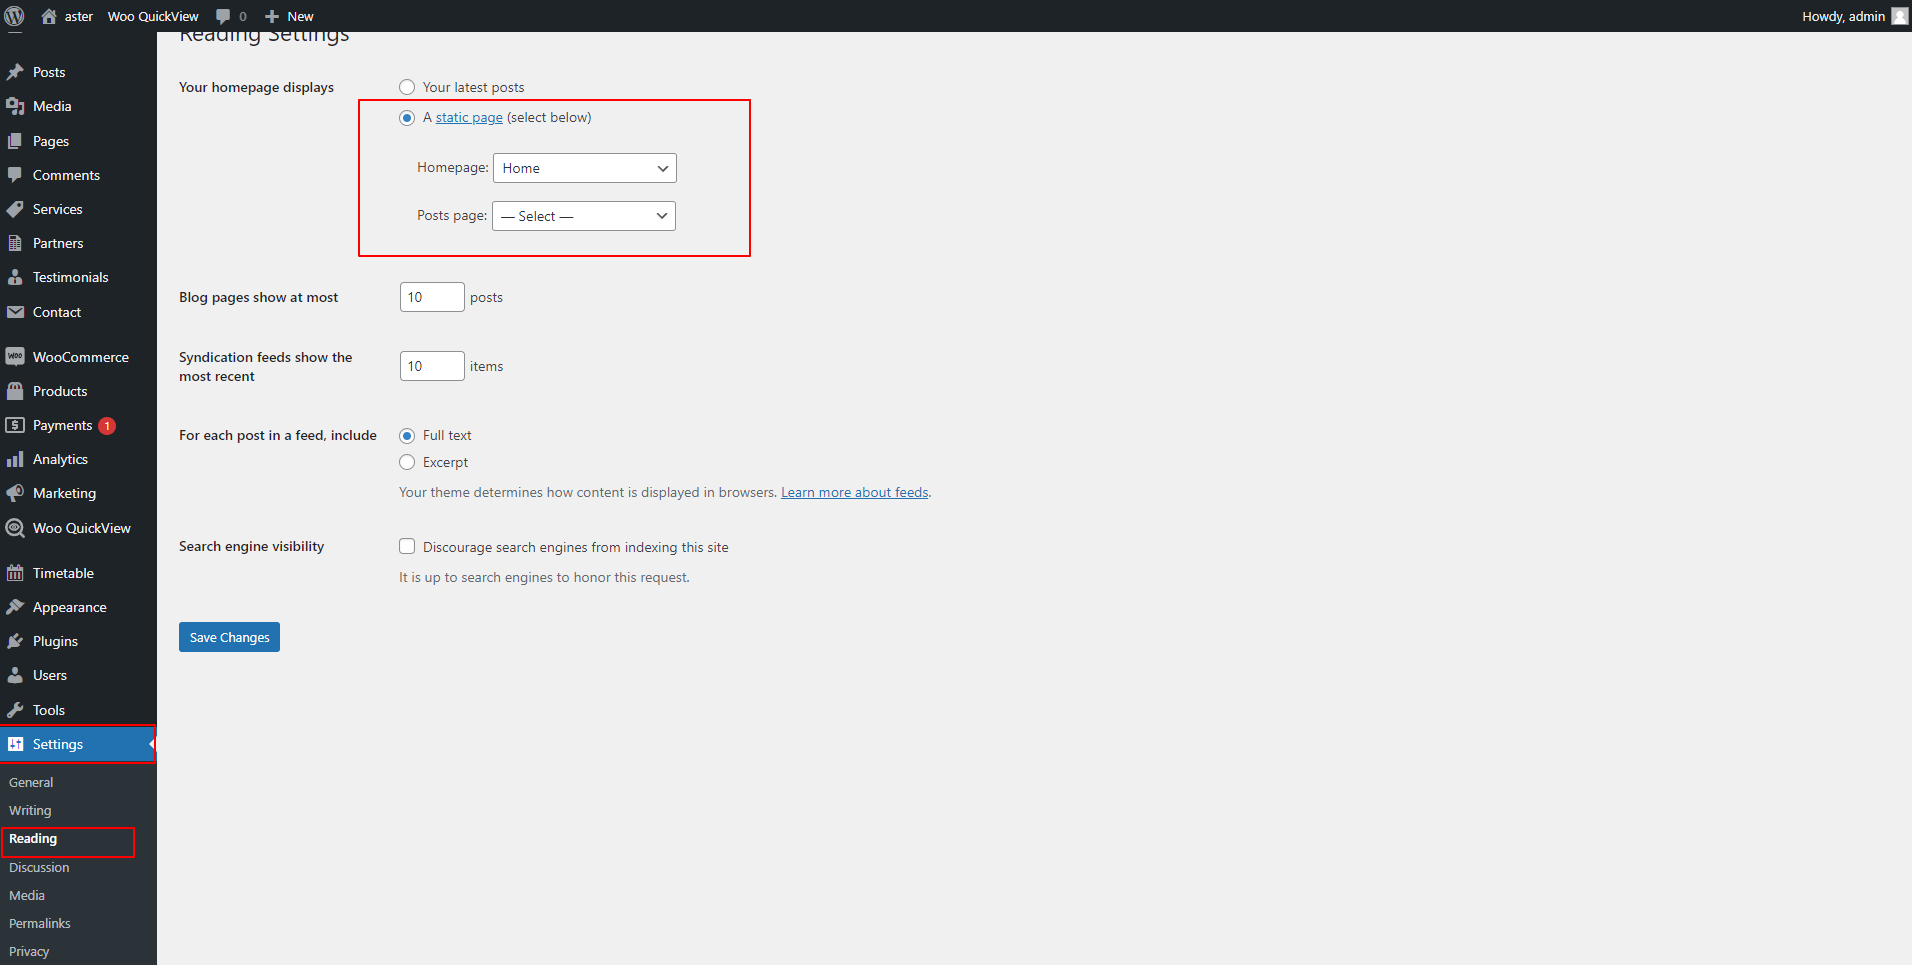
Homepage Setup
Establish your homepage by adhering to these guidelines.
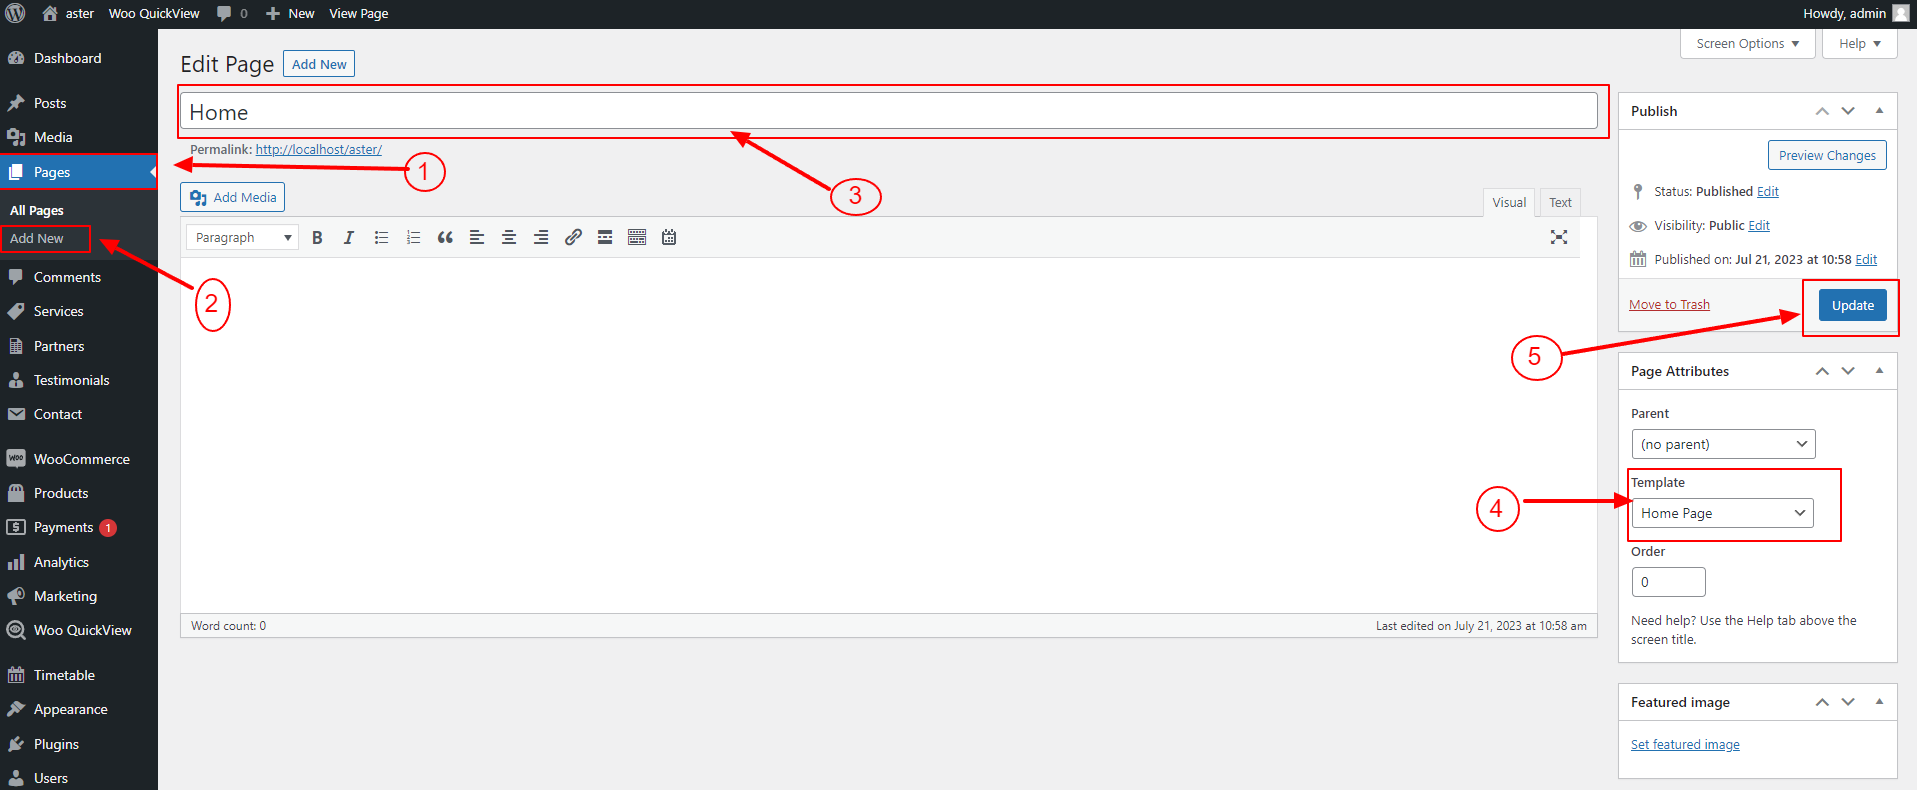
- Create Page to set template : Go to Dashboard > Pages > Add New Page. Select the template.
- Go to Dashboard > Settings > Reading, Set homepage displays to Static page, Select Home page.
Create Post
If you want to see all post then click on the Video > Video
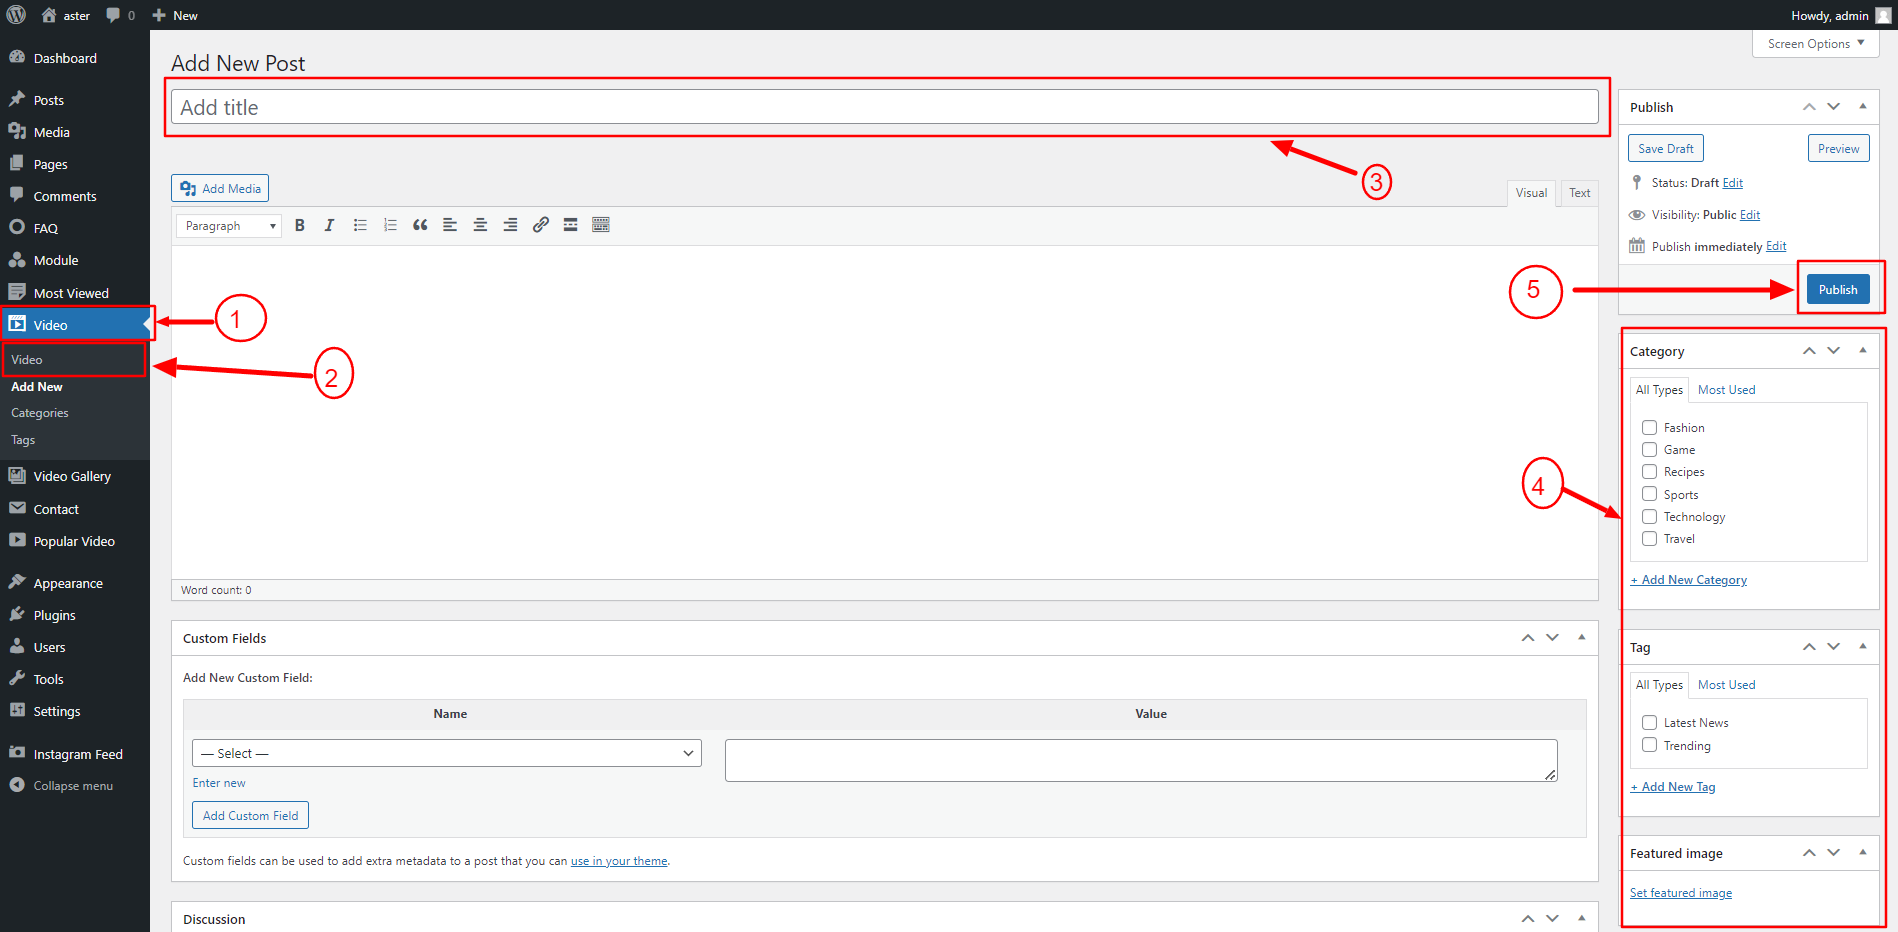
1. Post Create
- Go to Dashboard > Video > Add New.
- Fill Title , Content , Select Category & Tags , Select featured image and Click on Publish Button.
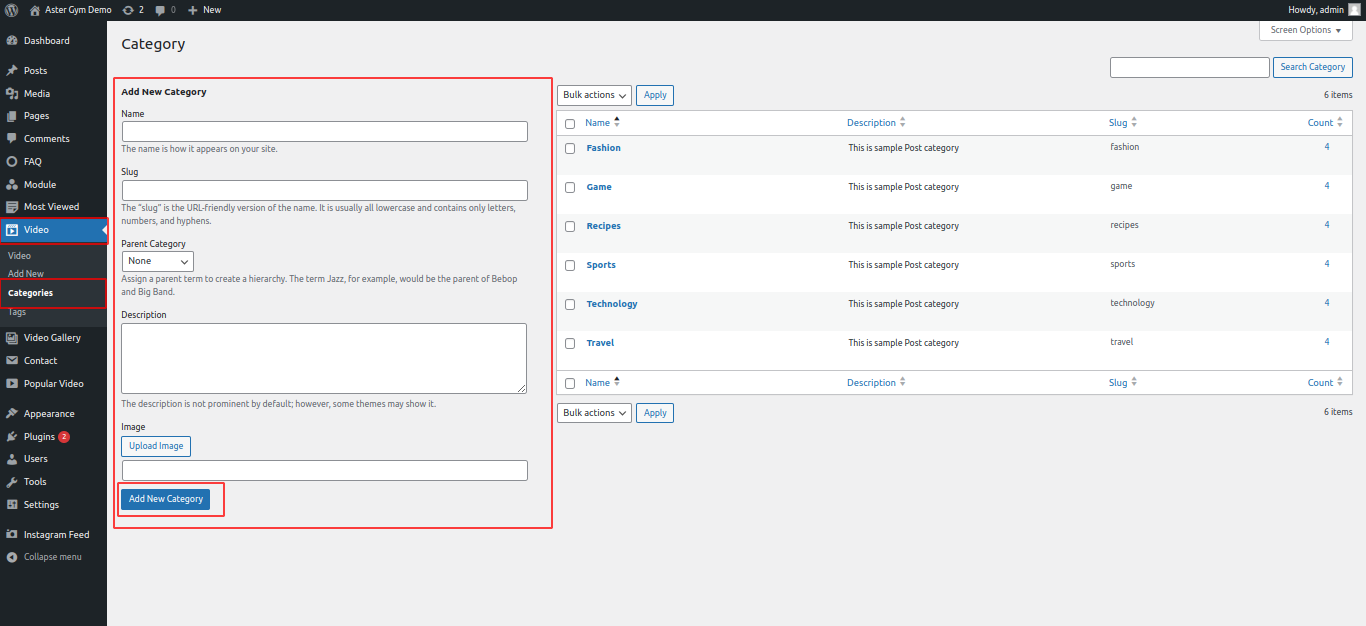
2. Category Create
- Go to Dashboard > Video > Categories.
- Enter Fill Name , Slug , Discription , Select image and Click on Add New Category Button.
- If Created Sub Category then select parent category while creating new category.
3. Tag Create
- Go to Dashboard > Video > Tags.
- Fill Name , Slug , Discription , Select image and Click on Add New Tag Button.
- If Created Sub Category then select parent category while creating new category.

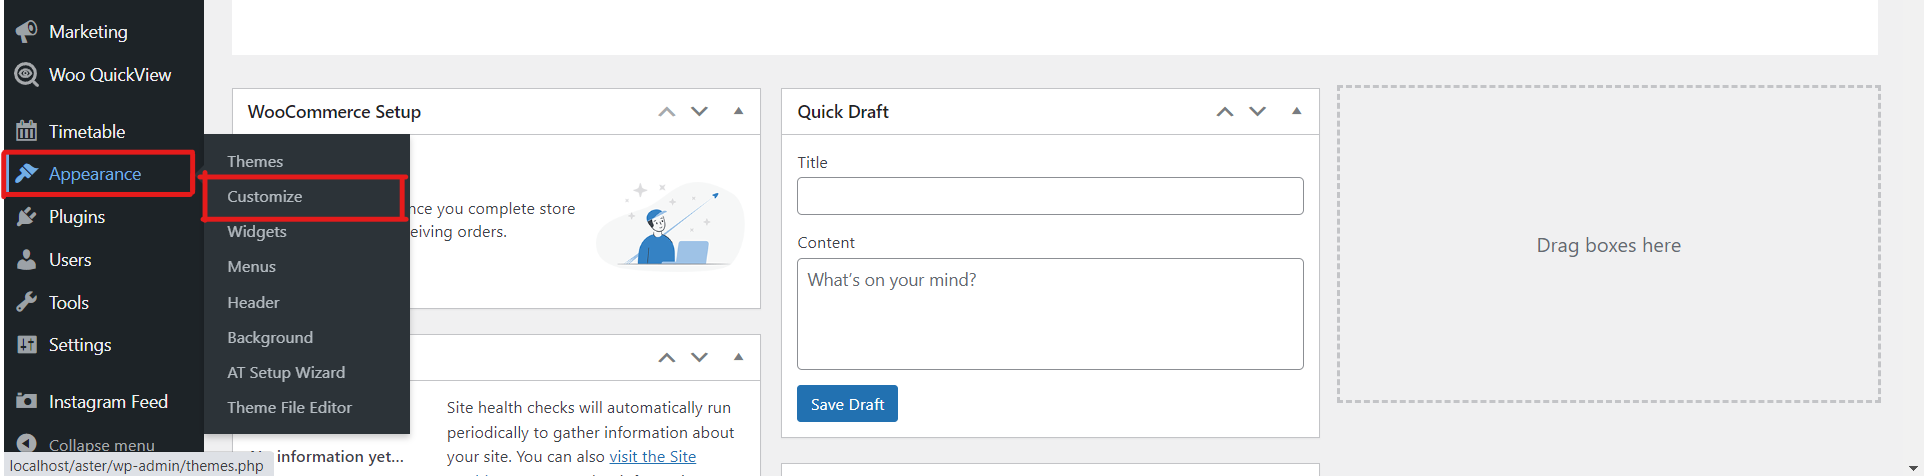
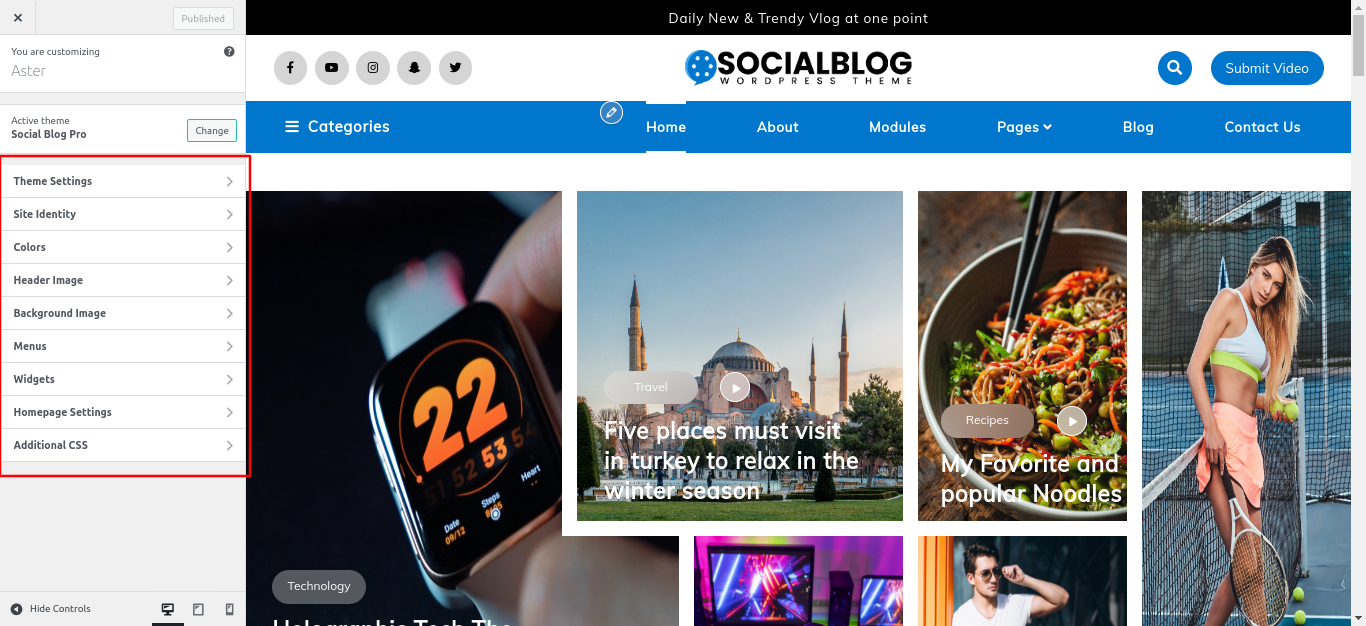
Customizer Settings
Customizer settings refer to a feature in WordPress that allows users to customize various aspects of their website's appearance and functionality in a user-friendly and interactive manner. The Customizer provides a live preview of the changes, making it easy for users to see how their modifications will look before saving them.
- Go to Appearance in the left-hand menu, and then Click on Customizer.
- The Customizer allows you to make changes to the theme settings, widgets, menus, backgrounds, colors, and more, depending on the options provided by your active theme and any installed plugins.
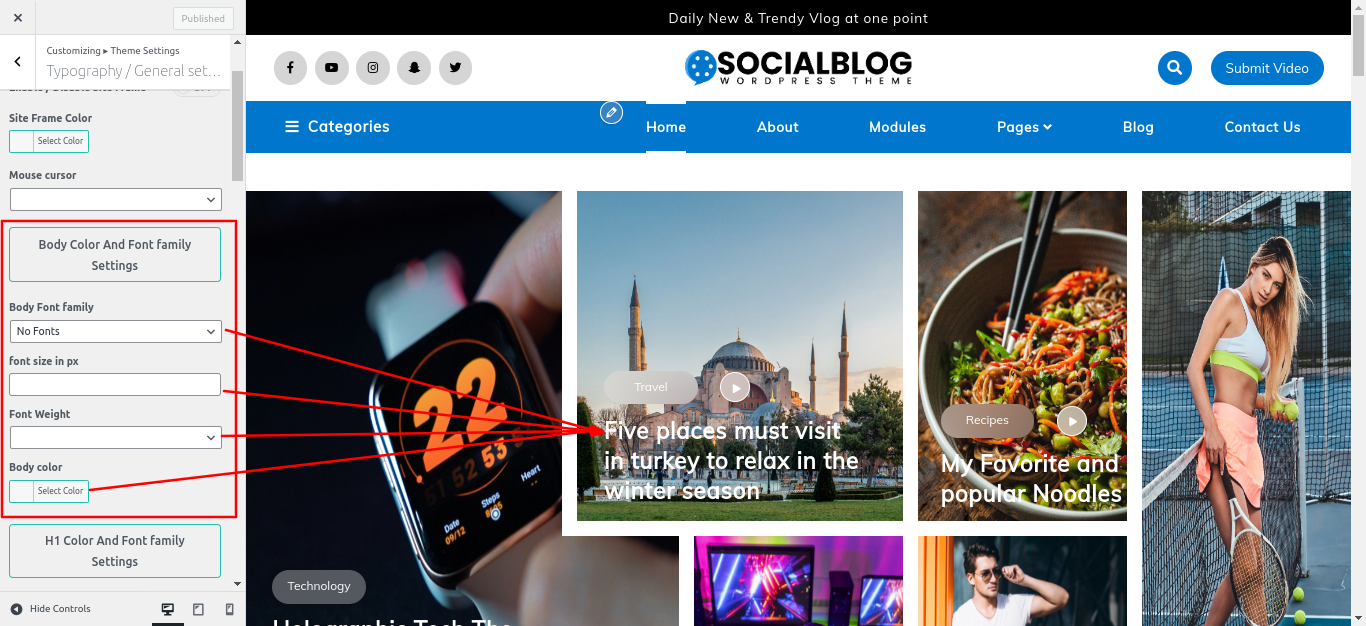
Typography
You can manage the font family and font size of body text, slider text, headings, paragraph, post/page title, button text.
- Go to the Appearance > Customize > Theme Settings > Typography.
- This Setting is use for hole body and all tags.
- After Edit Click on Publish Button.
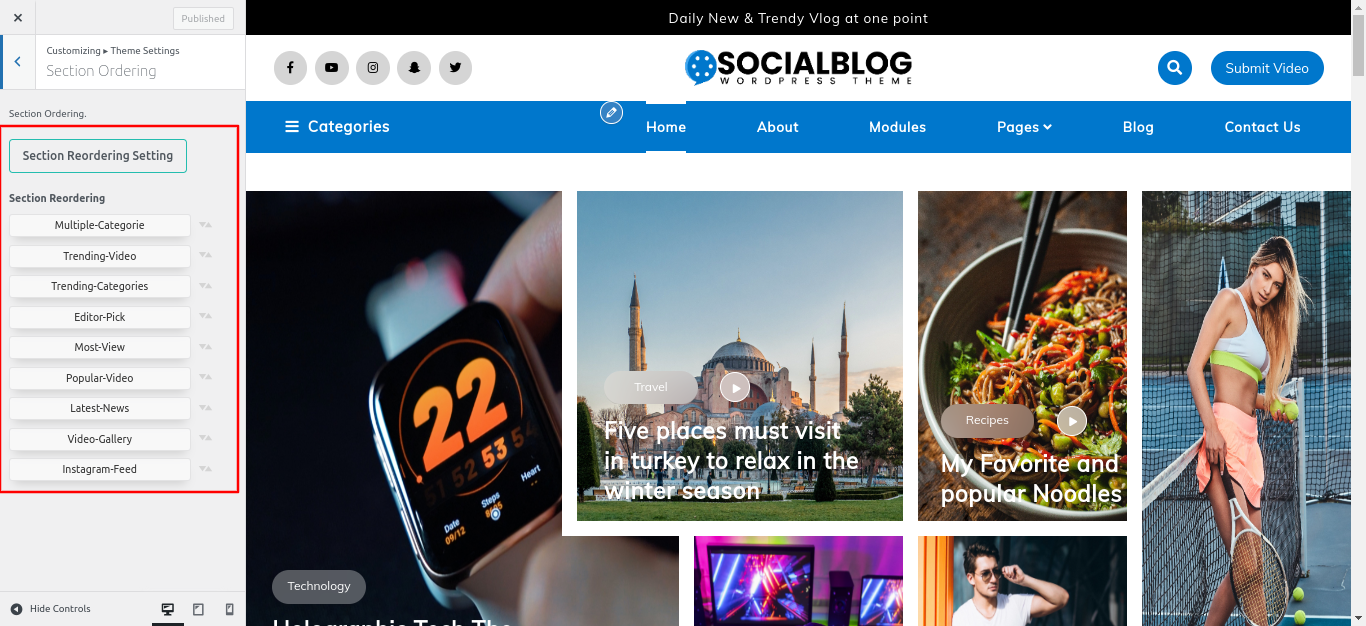
Section Ordering
This section provide section order and section Padding.
- Go to the Dashboard > Appearance > Customize > Theme Settings > Section Ordering.
- This Setting is use for section order.
- After Edit Click on Publish Button.
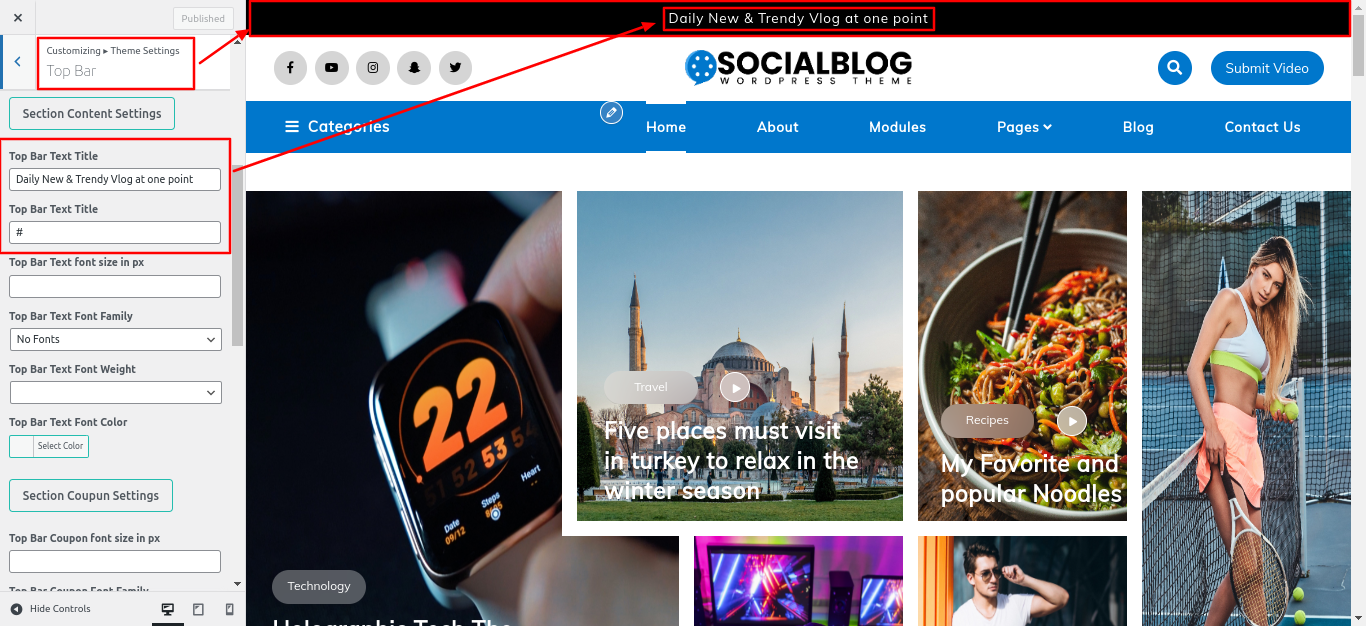
Top Bar
- Go to the Dashboard > Appearance > Customize > Theme Settings > Top Bar.
- After Edit Click on Publish Button.
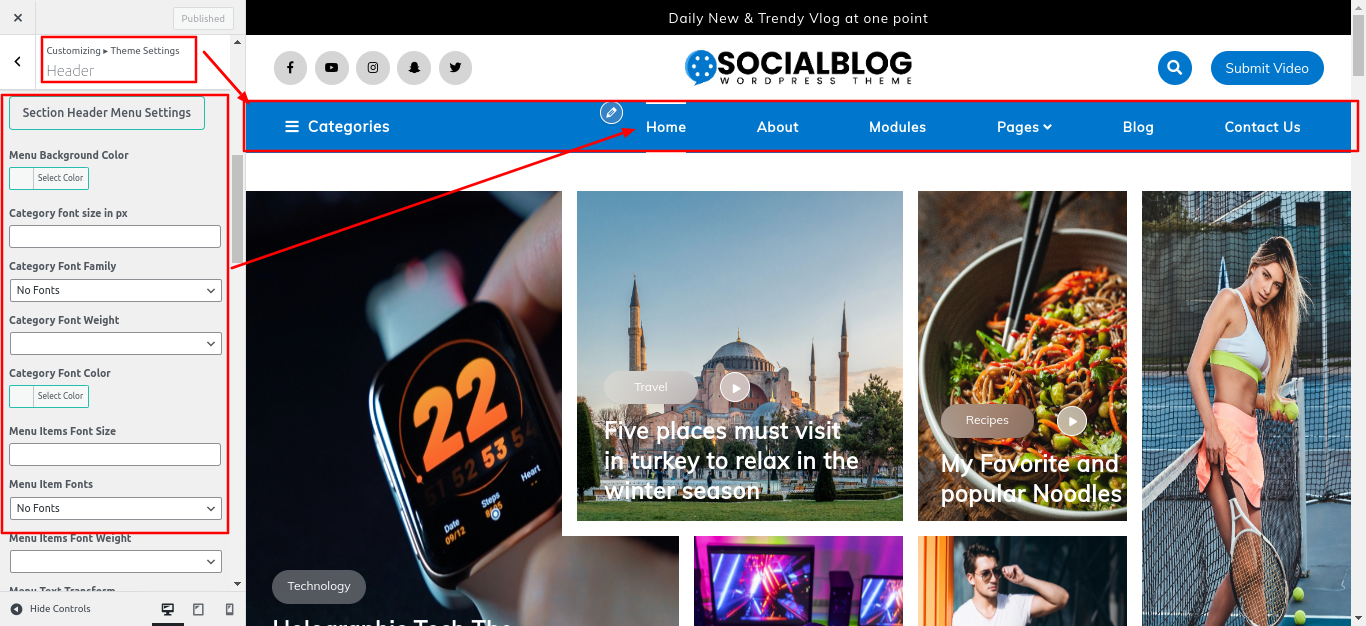
Header
In WordPress, the term Headerly refers to the top section of a website's page layout. It is a crucial part of the site's design as it often contains the site logo, navigation menu, and sometimes other important elements like contact information, social media icons, or a search bar.
- Go to the Dashboard > Appearance > Customize > Theme Settings > Header.
- In Header Added Primary Menu and menu are created in Navigation.
- After Edit Click on Publish Button.
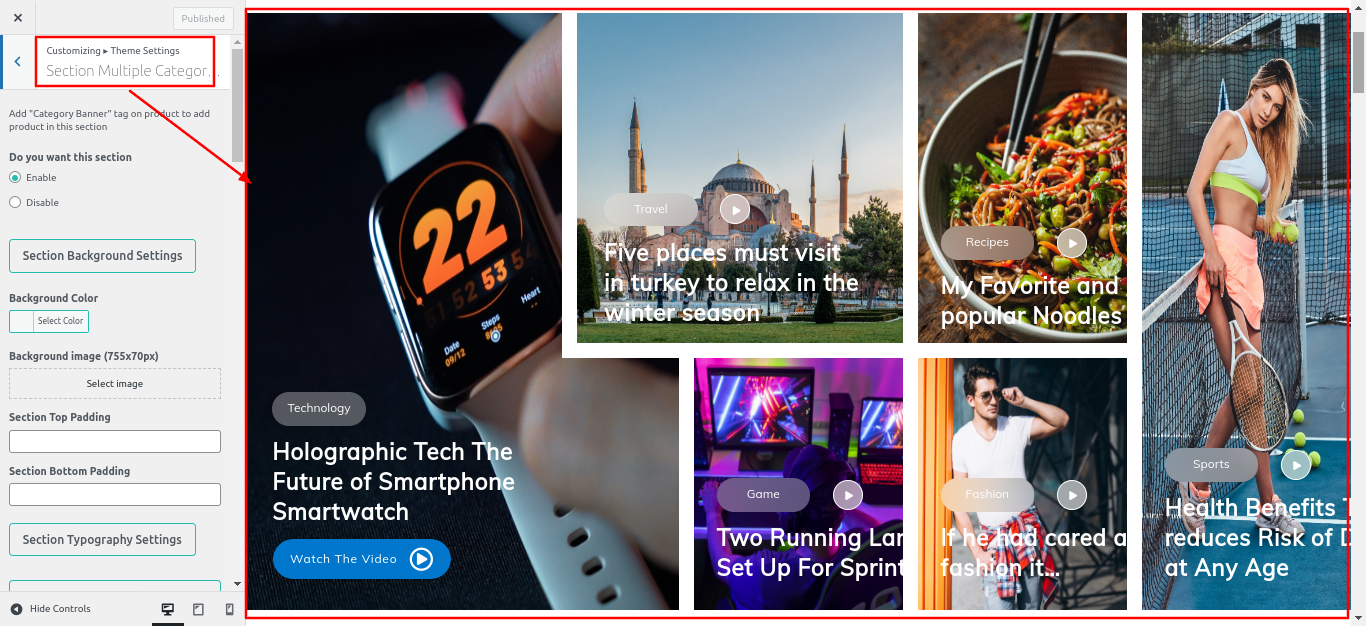
Multiple Categories
- All post are get from Video , Get single post from all Categories in this section.
- Go to the Dashboard > Appearance > Customize > Theme Settings > Multiple Categories.
- After Edit Click on Publish Button.
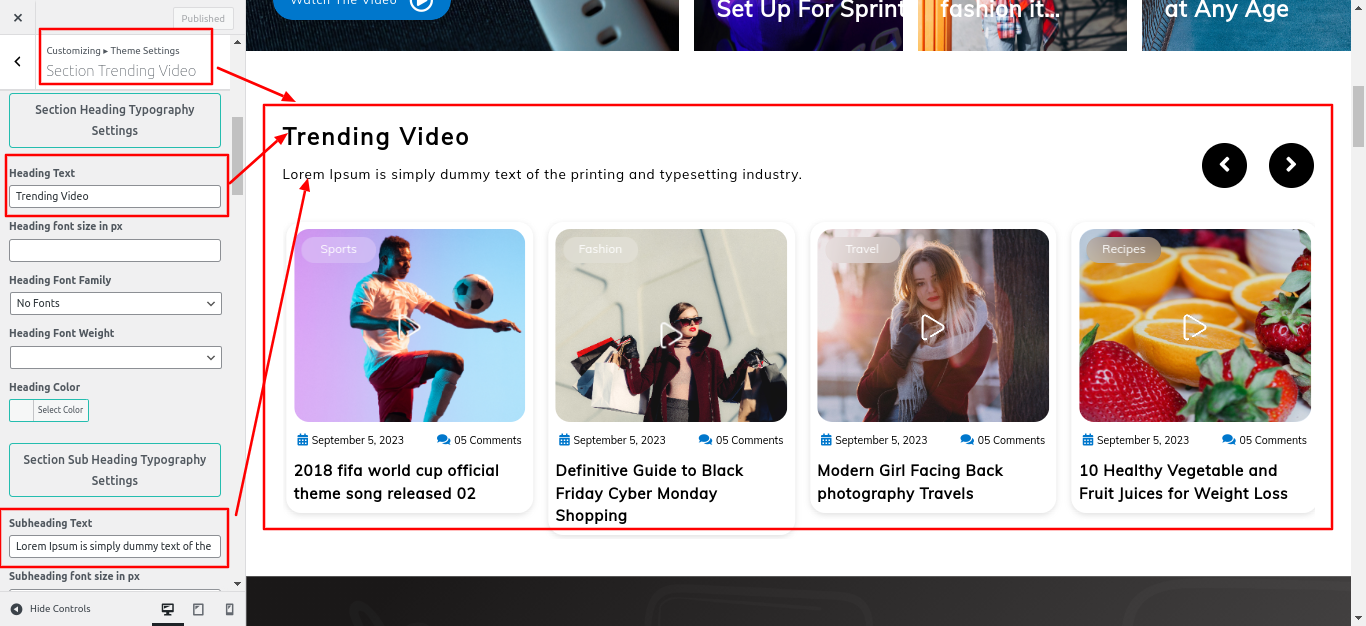
Trending Video
- This is a tag based secton, If you add this tag Trending in any post this post see in this section.
- Go to the Dashboard > Appearance > Customize > Theme Settings > Trending Video.
- After Edit Click on Publish Button.
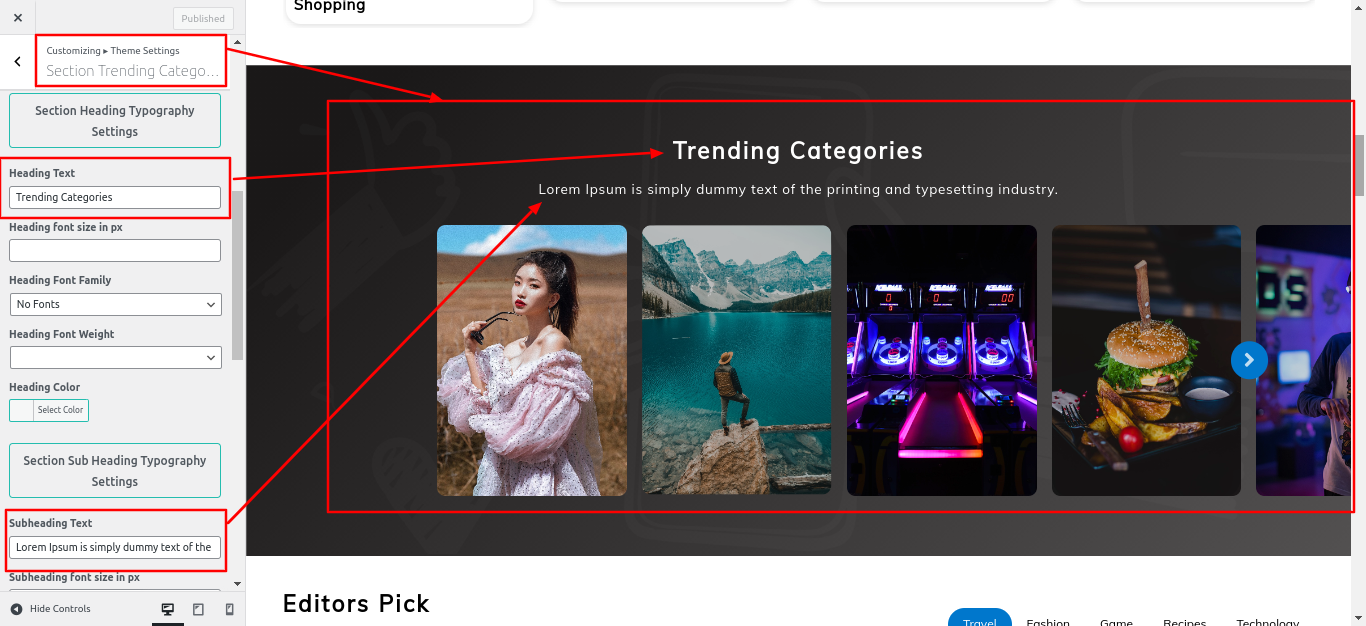
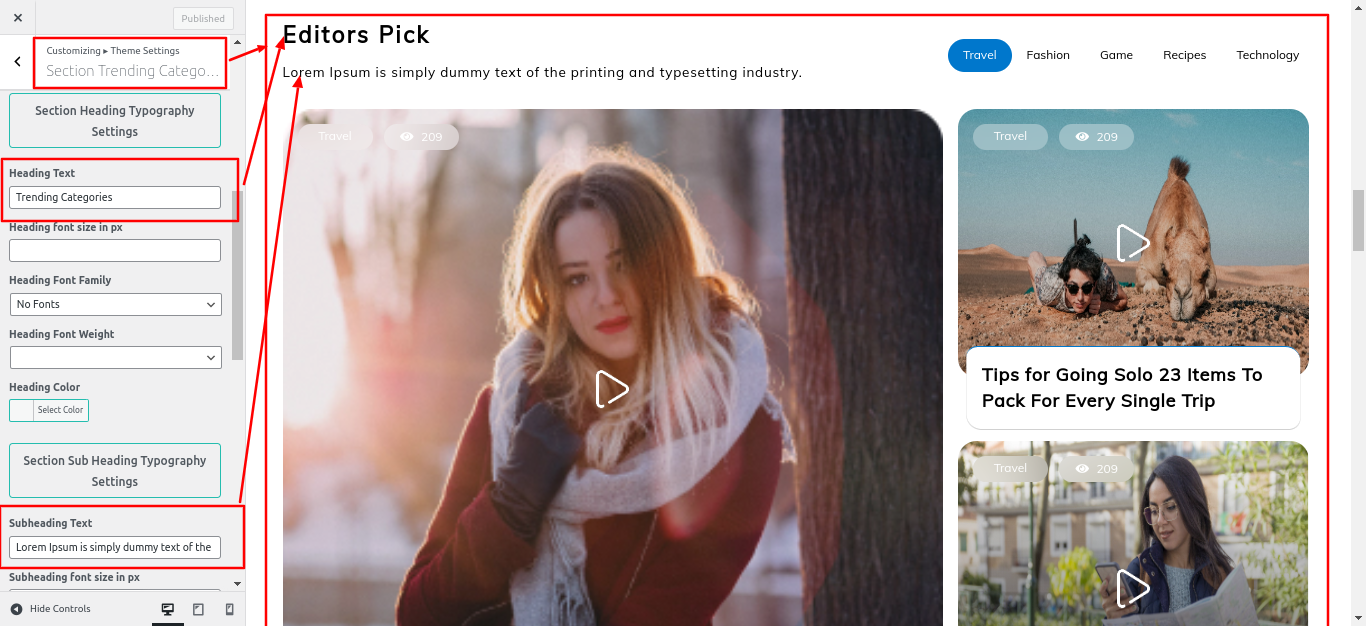
Trending Categories
- This are all top Categories , If yon Click on it you see all post of particular category.
- Go to the Dashboard > Appearance > Customize > Theme Settings > Trending Categories.
- After Edit Click on Publish Button.
Editor Pick
- This is a tab sction, This all tabs are category
- Go to the Dashboard > Appearance > Customize > Theme Settings > Editor Pick.
- After Edit Click on Publish Button.
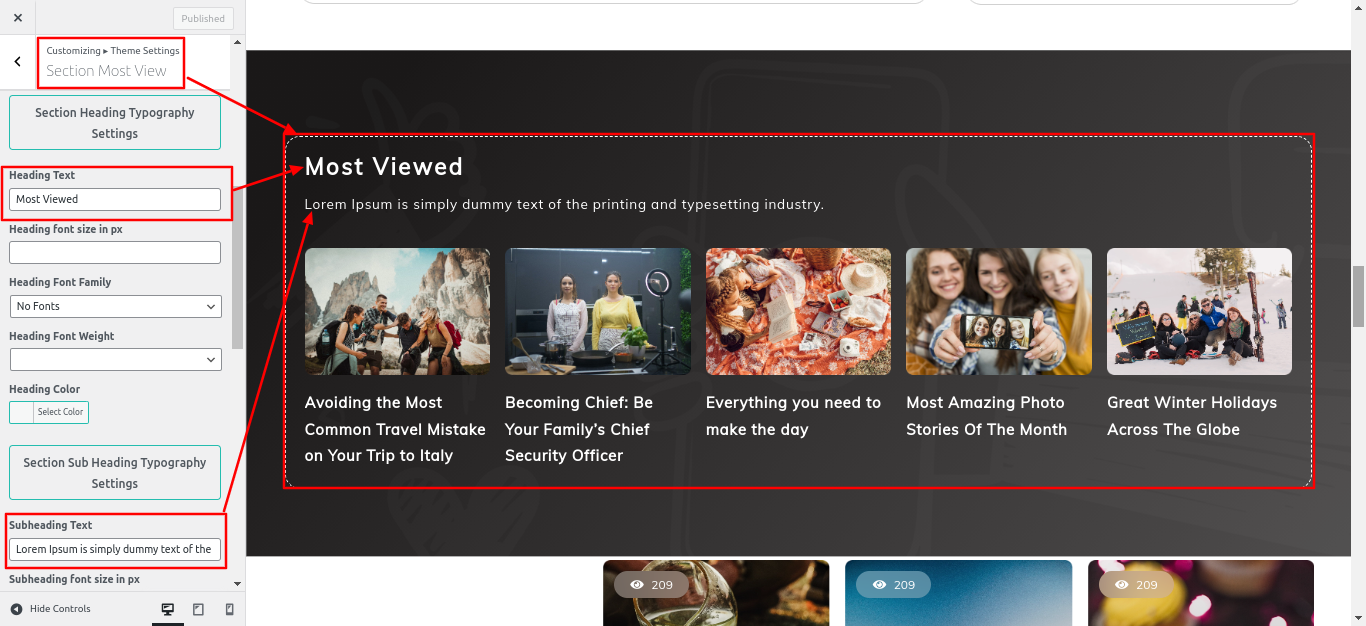
Most View
- If you add or delete the post in Most View Section.
- Go to the Dashboard > Dashboard > Most View > Add New.
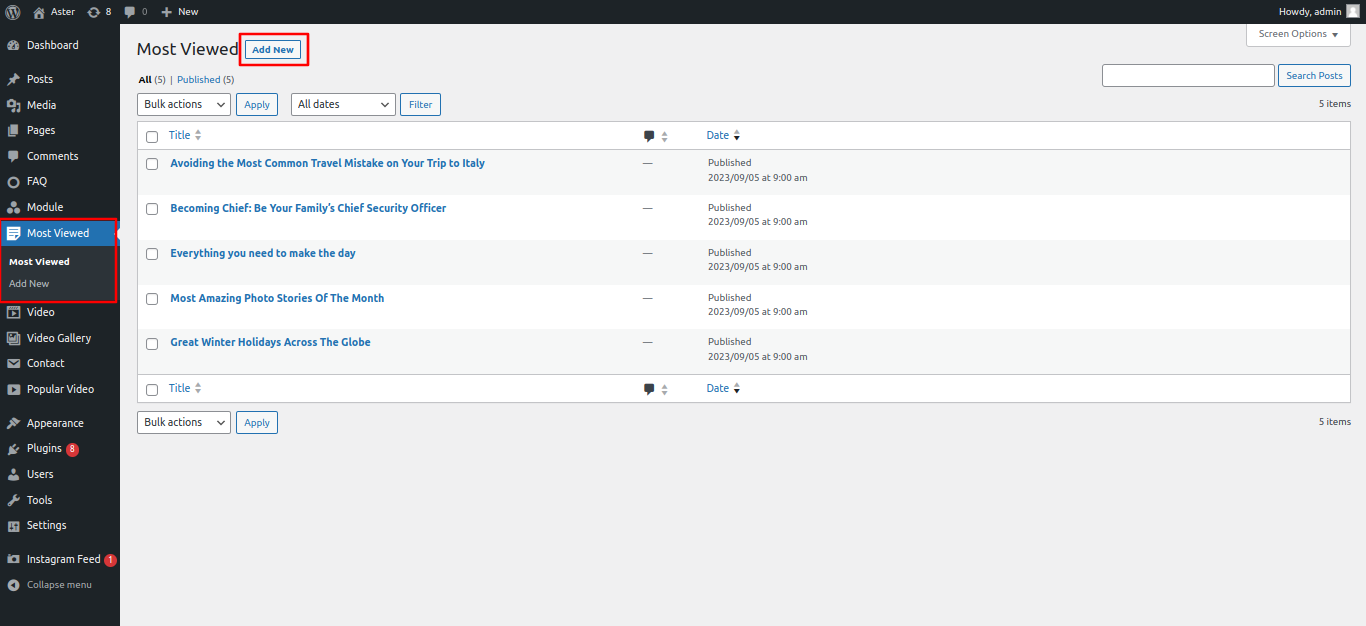
- Edit the post.
- Go to the Appearance > Customize > Theme Settings > Most View.
- After Edit Click on Publish Button.
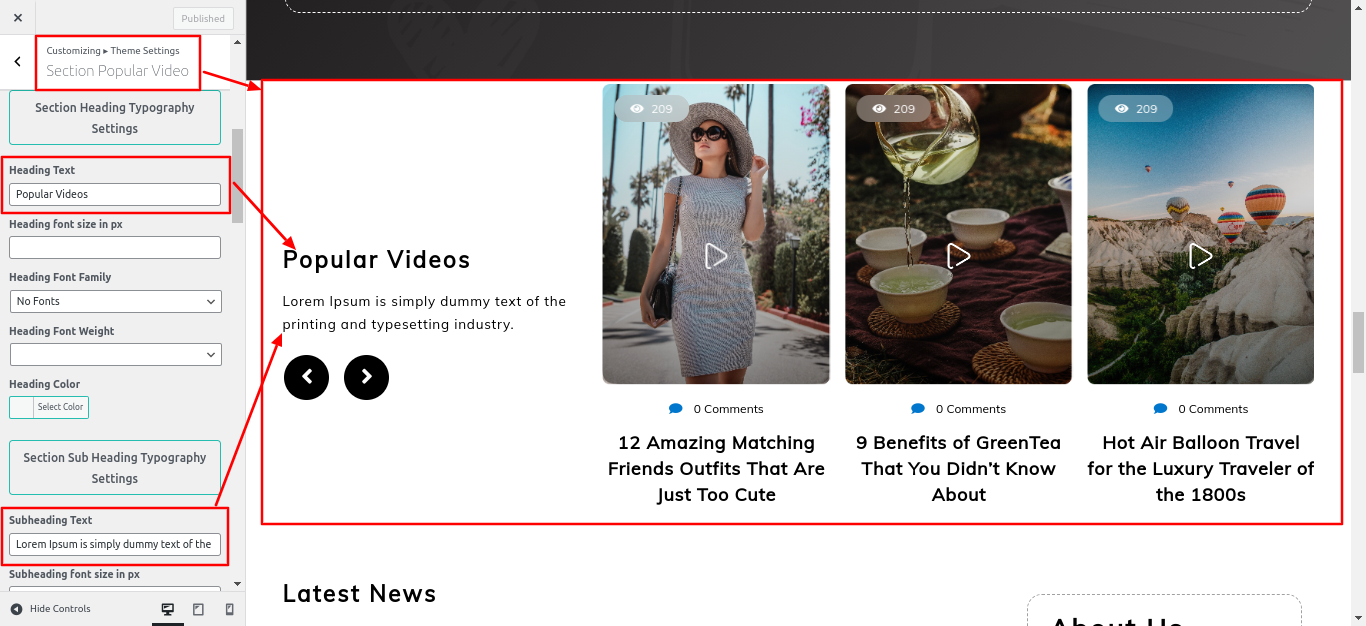
Popular Video
- If you add or delete the post in Popular Video Section.
- Go to the Dashboard > Popular Video > Add New.
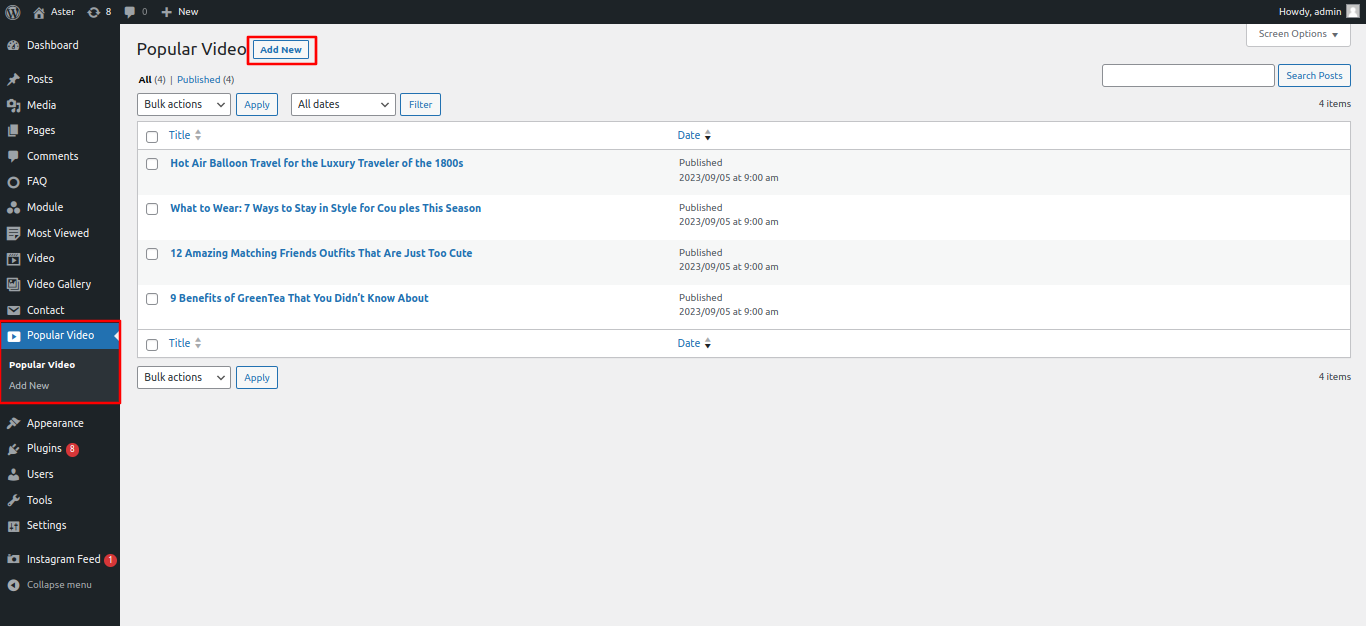
- Edit the post.
- Go to the Dashboard > Appearance > Customize > Theme Settings > Popular Video.
- After Edit Click on Publish Button.
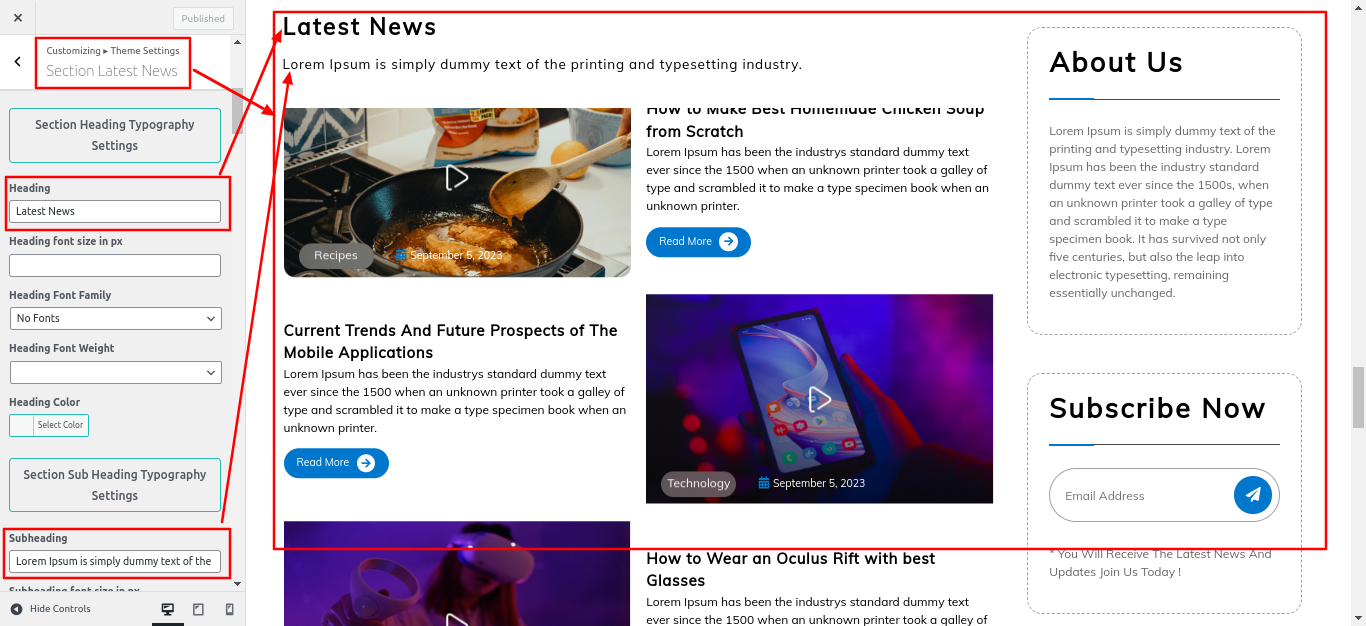
Latest News
- This is a tag based secton, If you add this tag Latest News in any post this post see in this section.
- Go to the Dashboard > Appearance > Customize > Theme Settings > Latest News.
- After Edit Click on Publish Button.
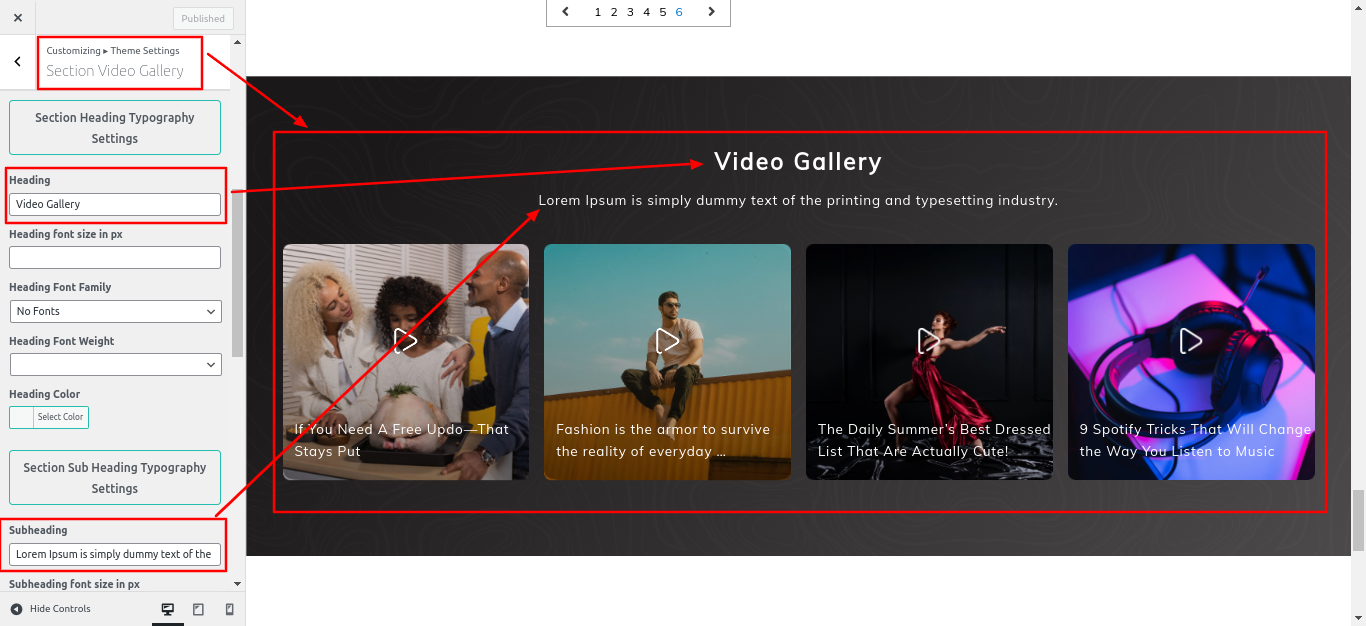
Video Gallery
- If you add or delete the post in Video Gallery Section.
- Go to the Dashboard > Video Gallery > Add New.
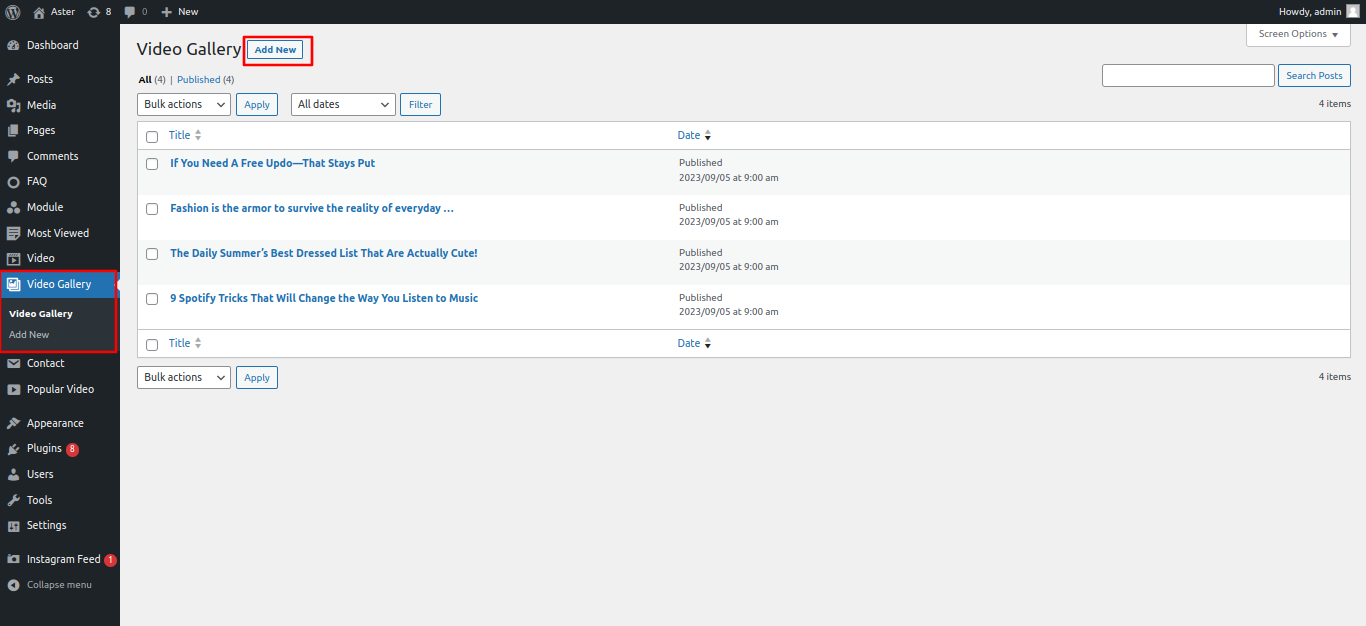
- Edit the post.
- Go to the Dashboard > Appearance > Customize > Theme Settings > Video Gallery.
- After Edit Click on Publish Button.
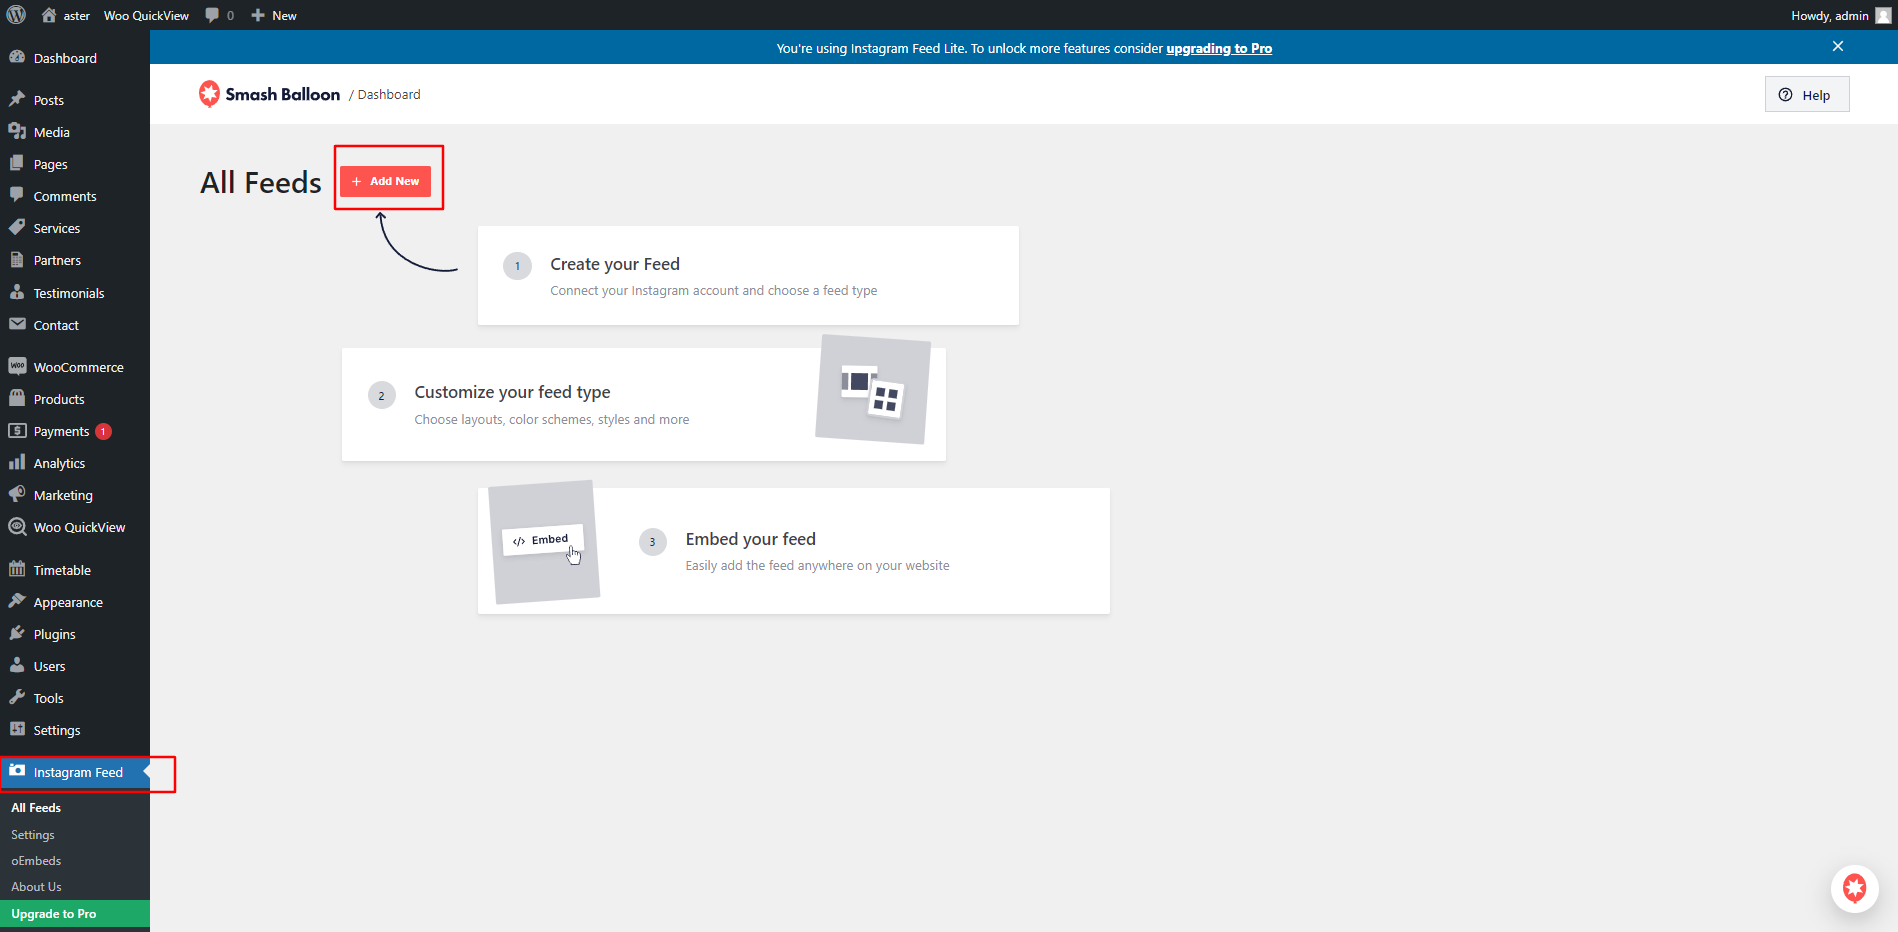
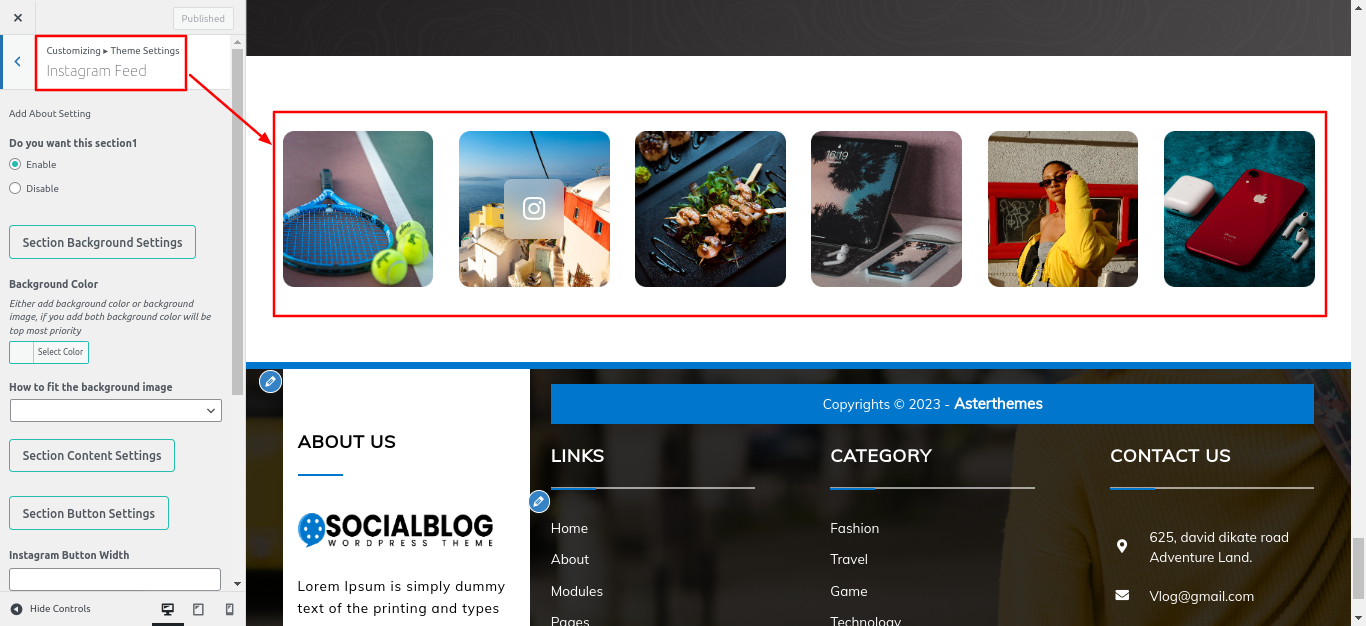
- Go to the Dashboard > Instagram Feed.
- Click on that ,Added ur Instagram Account.
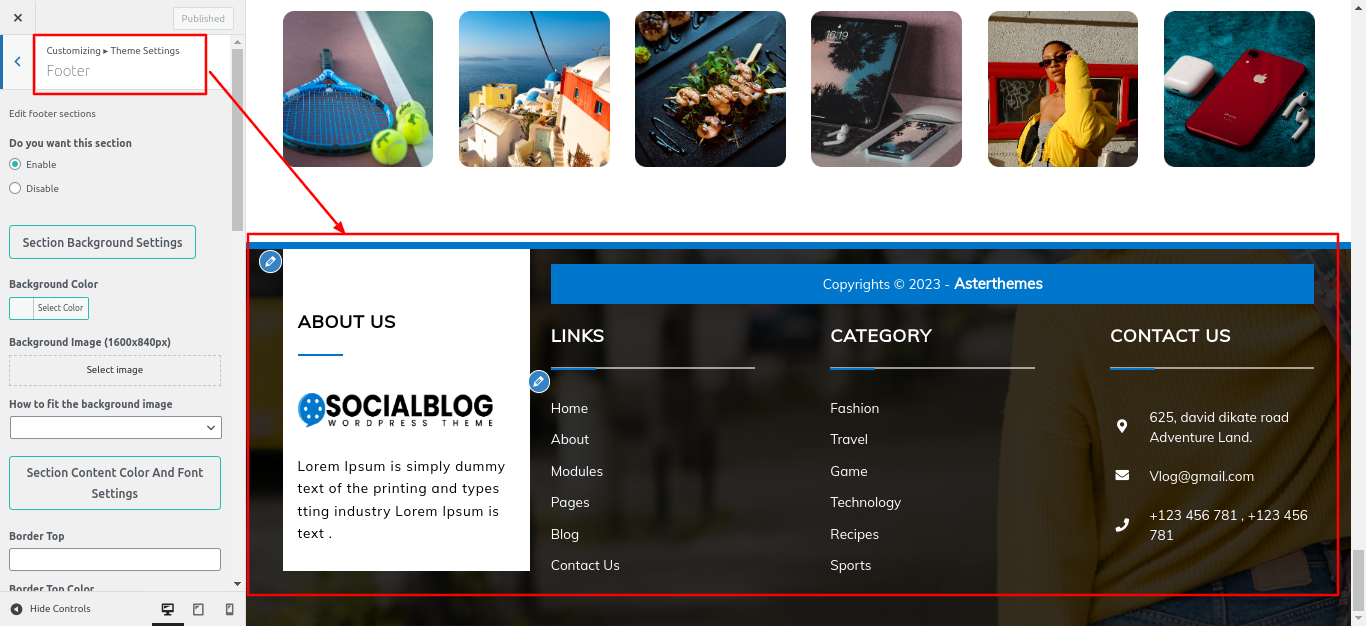
Footer
- Go to the Dashboard > Appearance > Customize > Theme Settings > Footer.
- Create a footer , Go to Dashboard > Appearance > Widgets.
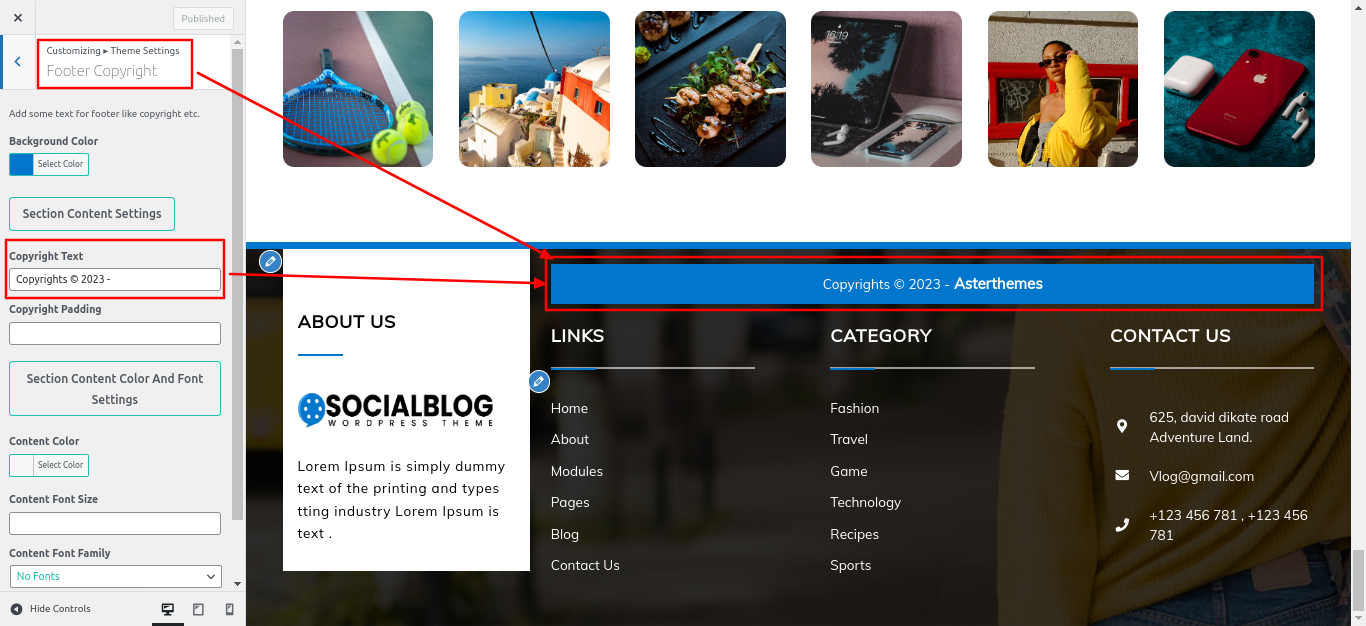
Copyright
- Go to the Dashboard > Appearance > Customize > Theme Settings > Copyright.
- After Edit Click on Publish Button.
Navigation
Navigation menus help visitors find and access different pages and sections of your site easily. In WordPress, you can set up navigation using menus.
- Go to Dashboard > Appearance and then Menus.
- Click on the Create a new menu link.
- Enter a name for your menu (e.g., Main Menu) and click the Create Menu button.
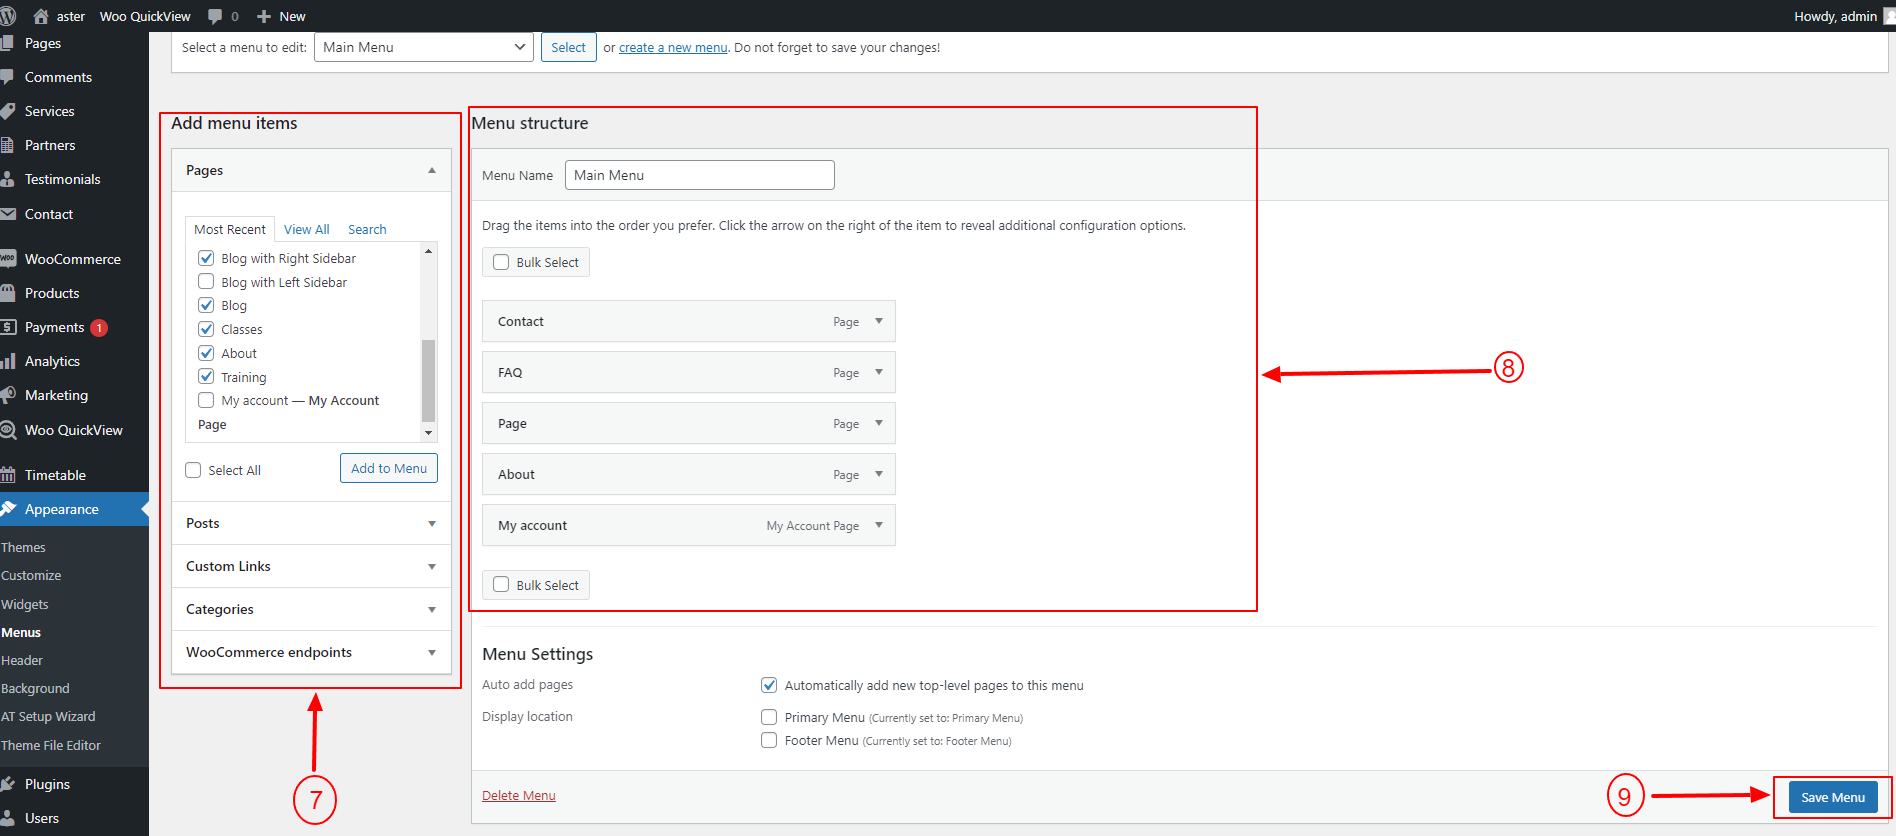
- In the left column, you'll see a list of pages, posts, custom links, and categories (if you have any).
- Select the pages, posts, or custom links you want to add to the menu by checking the corresponding boxes, and then click the Add to Menu button.
- Drag and drop the menu items to arrange them in the desired order. The top item will usually be the Home or Logo link.
Create New Menu Settings

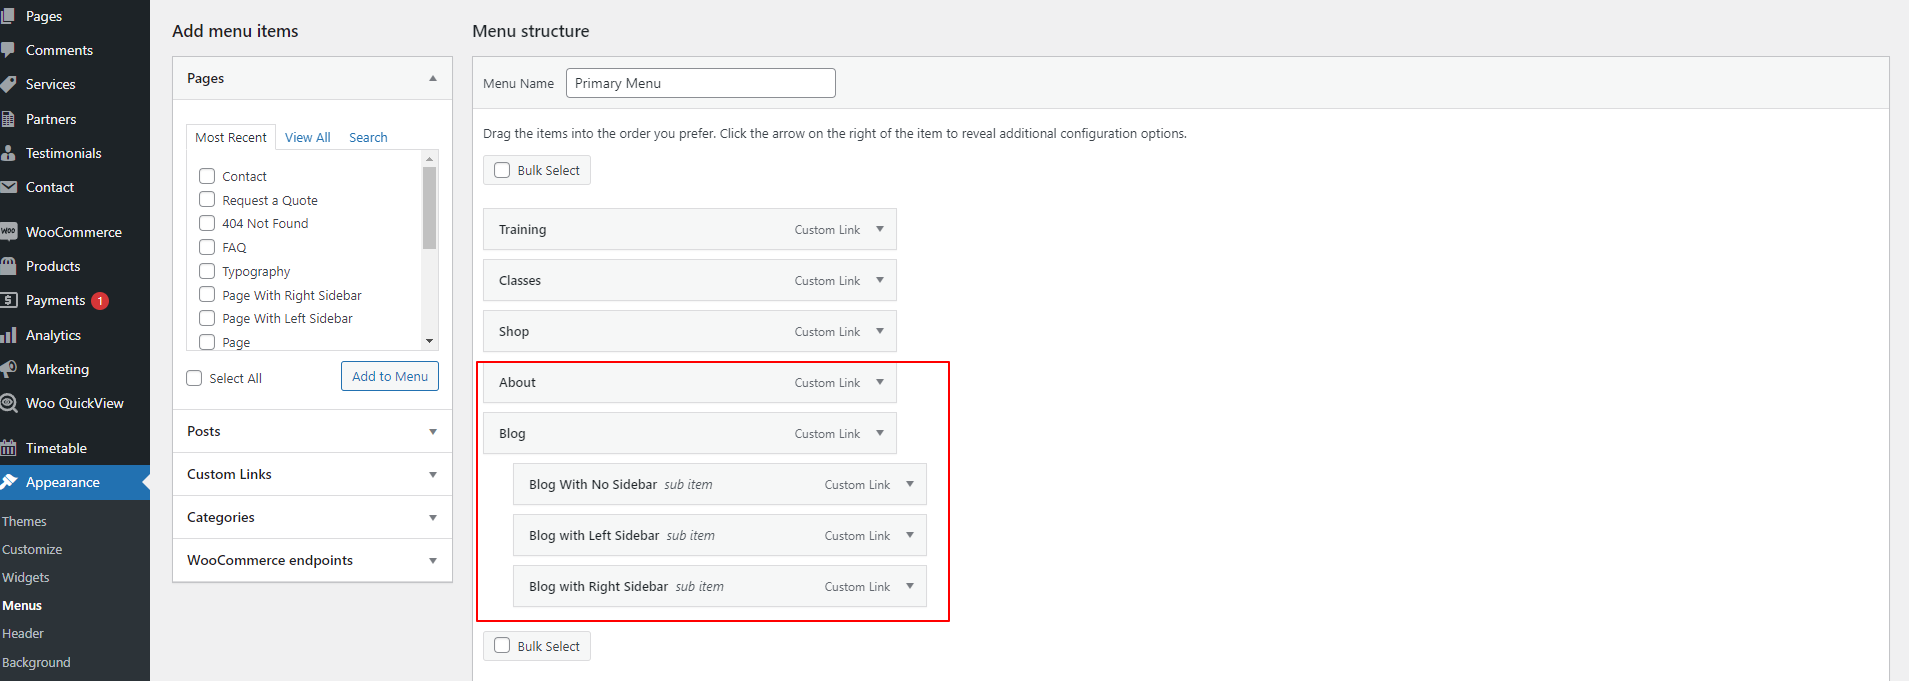
- To create sub-menus (drop-down menus), drag a menu item slightly to the right (below and indented) of another menu item. This will make it a submenu item.
- For each menu item, you can click the small arrow on the right to expand its options.
- For custom links, you can enter the URL of the page you want the link to direct to.
Create Sub Menu
Page Templates & Sidebars
- Default Template (Default page template with sidebar on the right).
- Home Page Template (Template for displaying homepage content).
- Blog Full Width Extend (Page template with no sidebar position).
- Blog with Left Sidebar (Template for blogs with the sidebar positioned on the left).
- Blog With Right Sidebar (Template for blogs with the sidebar positioned on the right).
- Page with Left Sidebar (Template for pages with the sidebar positioned on the left).
- Page With Right Sidebar (Template for pages with the sidebar positioned on the right).
- Contact Template (The default Contact template with no sidebar position).
Post, Categories and Post Formats
In WordPress, Posts , Categories and Post Formats are essential components used to organize and structure your website's content. Understanding how they work will help you create a well-structured and easily navigable website.
Add category
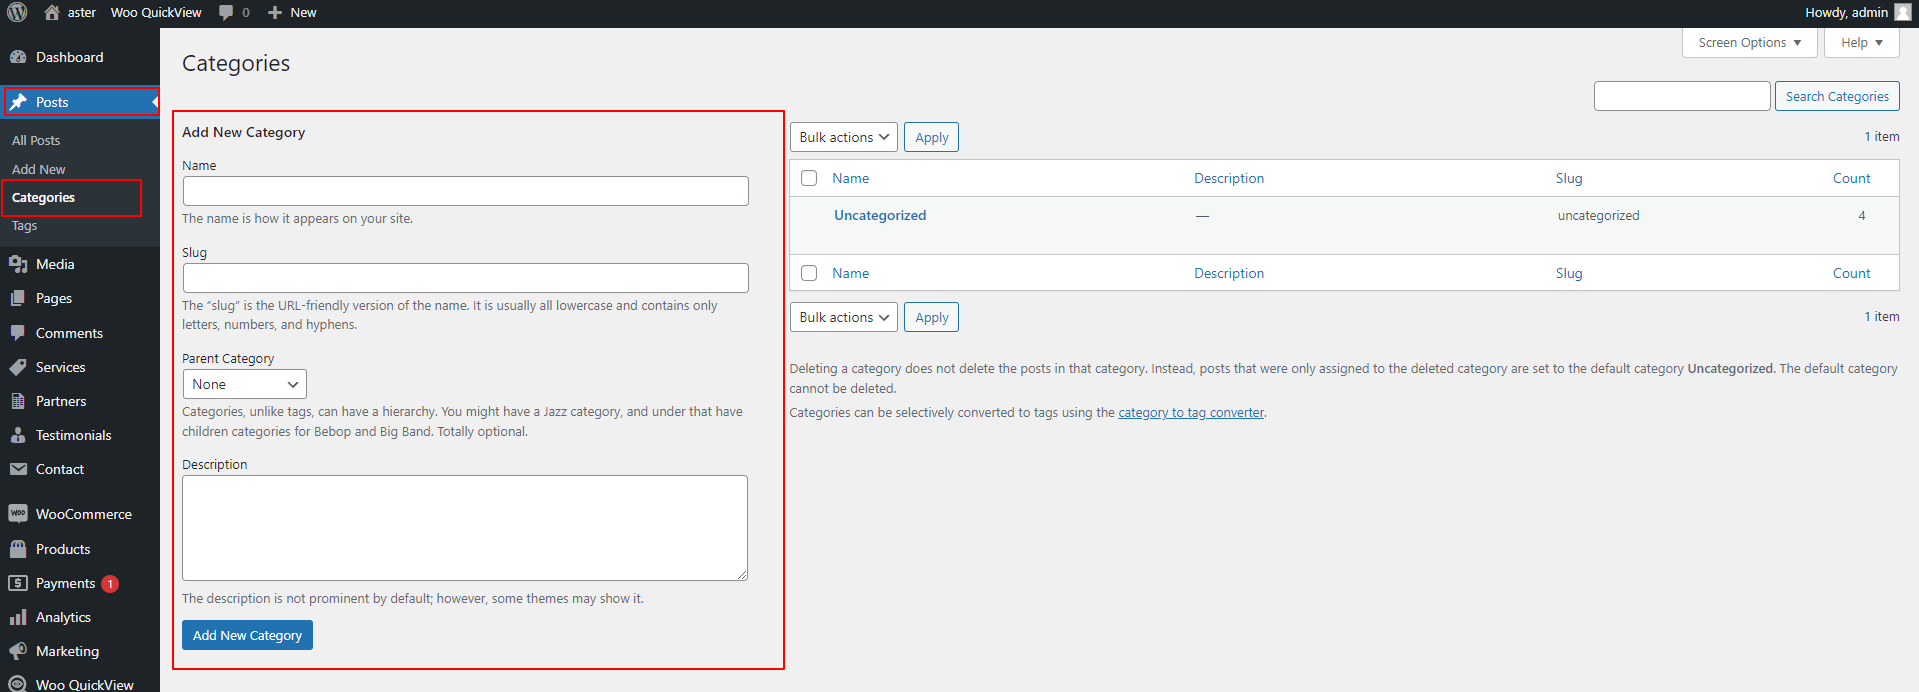
- Go to Dashboard > Posts on the left sidebar, and then click on Categories.
- Give your category a name (e.g., "Technology," "Travel," "Recipes," etc.)
- Enter your slug or leave empyt Because it is usually auto-generated based on the name but can be edited if needed
- If you want to create a hierarchical structure for your categories, you can assign a parent category. This makes the new category a sub-category of the parent.
- You can add a description for the category to provide more context about its content.
- After filling in the details, click the Add New Category button to create the category
For further details on Add Category, look at the following article: Click Here
Create Blog Post
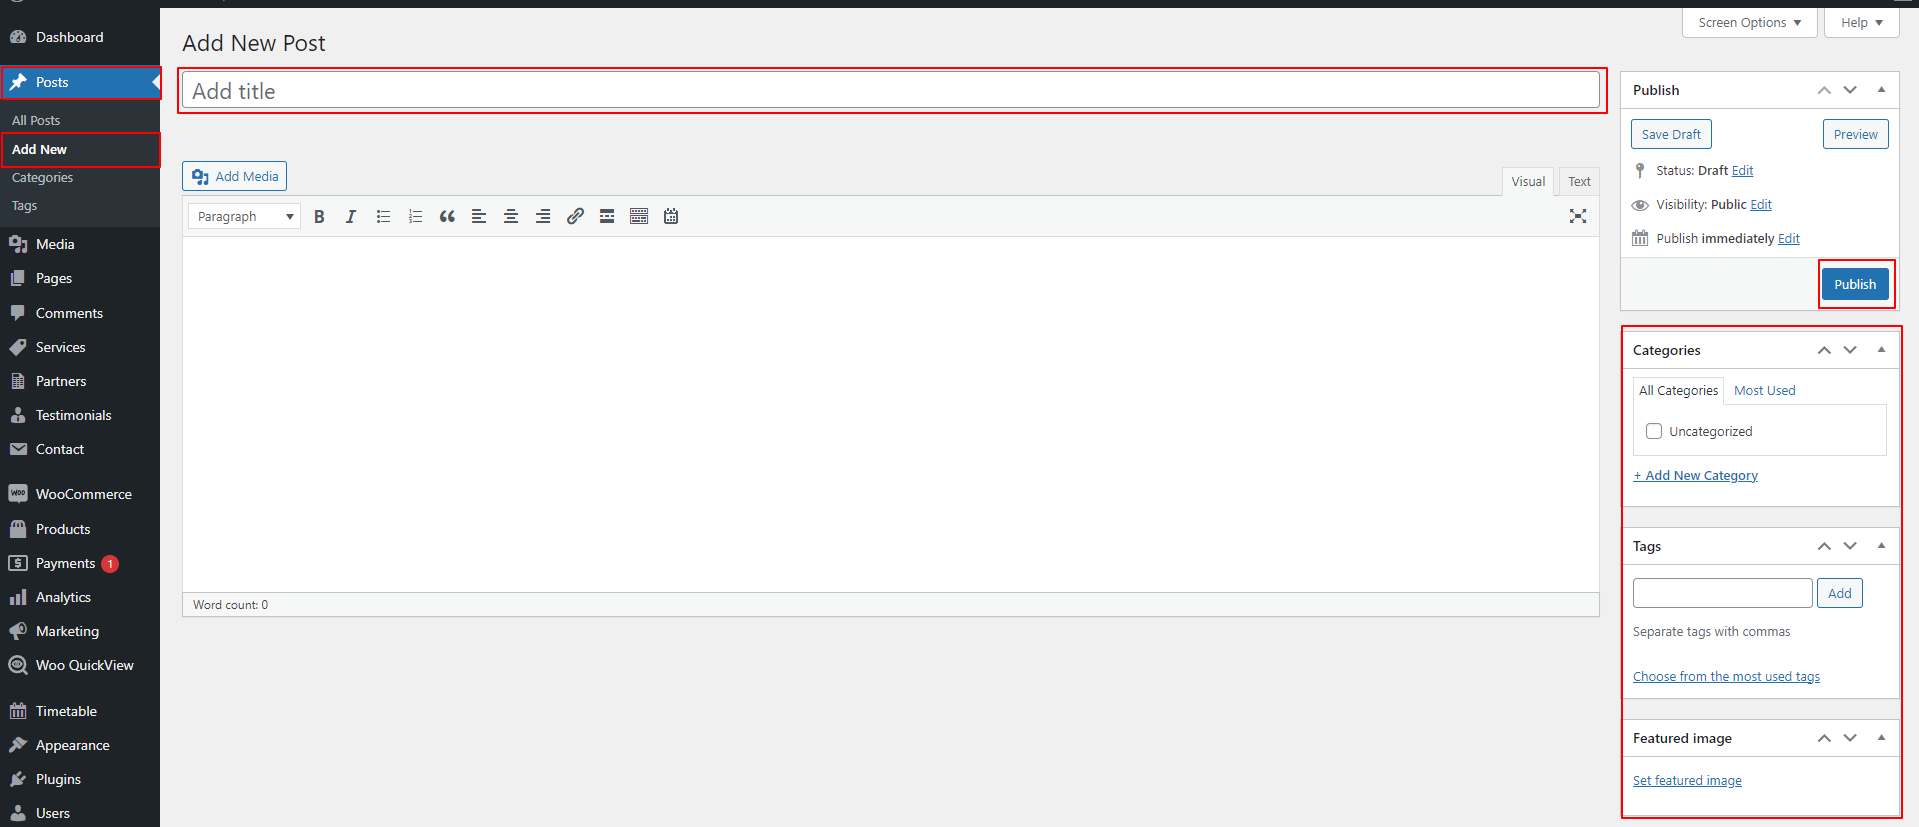
- Go to Dashboard > Posts on the left sidebar and click on Add New.
- Enter the title of your blog post.
- On the right side of the editor, you can select categories.
- On the right side of the editor, you can Tags.
- On the right side of the editor, you can Add Featured Image.
- click the "Publish" button on the top-right corner of the editor.
For further details on Add Post, look at the following article: Click Here
Shortcodes
A shortcode is an effective instrument for creating content. "http://codex.wordpress.org/Shortcode" Utilizing shortcodes is simple. Make sure the editing option is initially set to Visual.
Woocommerce Product Shortcodes : [products per_page="12" columns="4" orderby="date" order="ASC"]
Contact Form : [contact-form-7 id="5" title="Contact form 1"]
Instagram Feed : [instagram-feed]

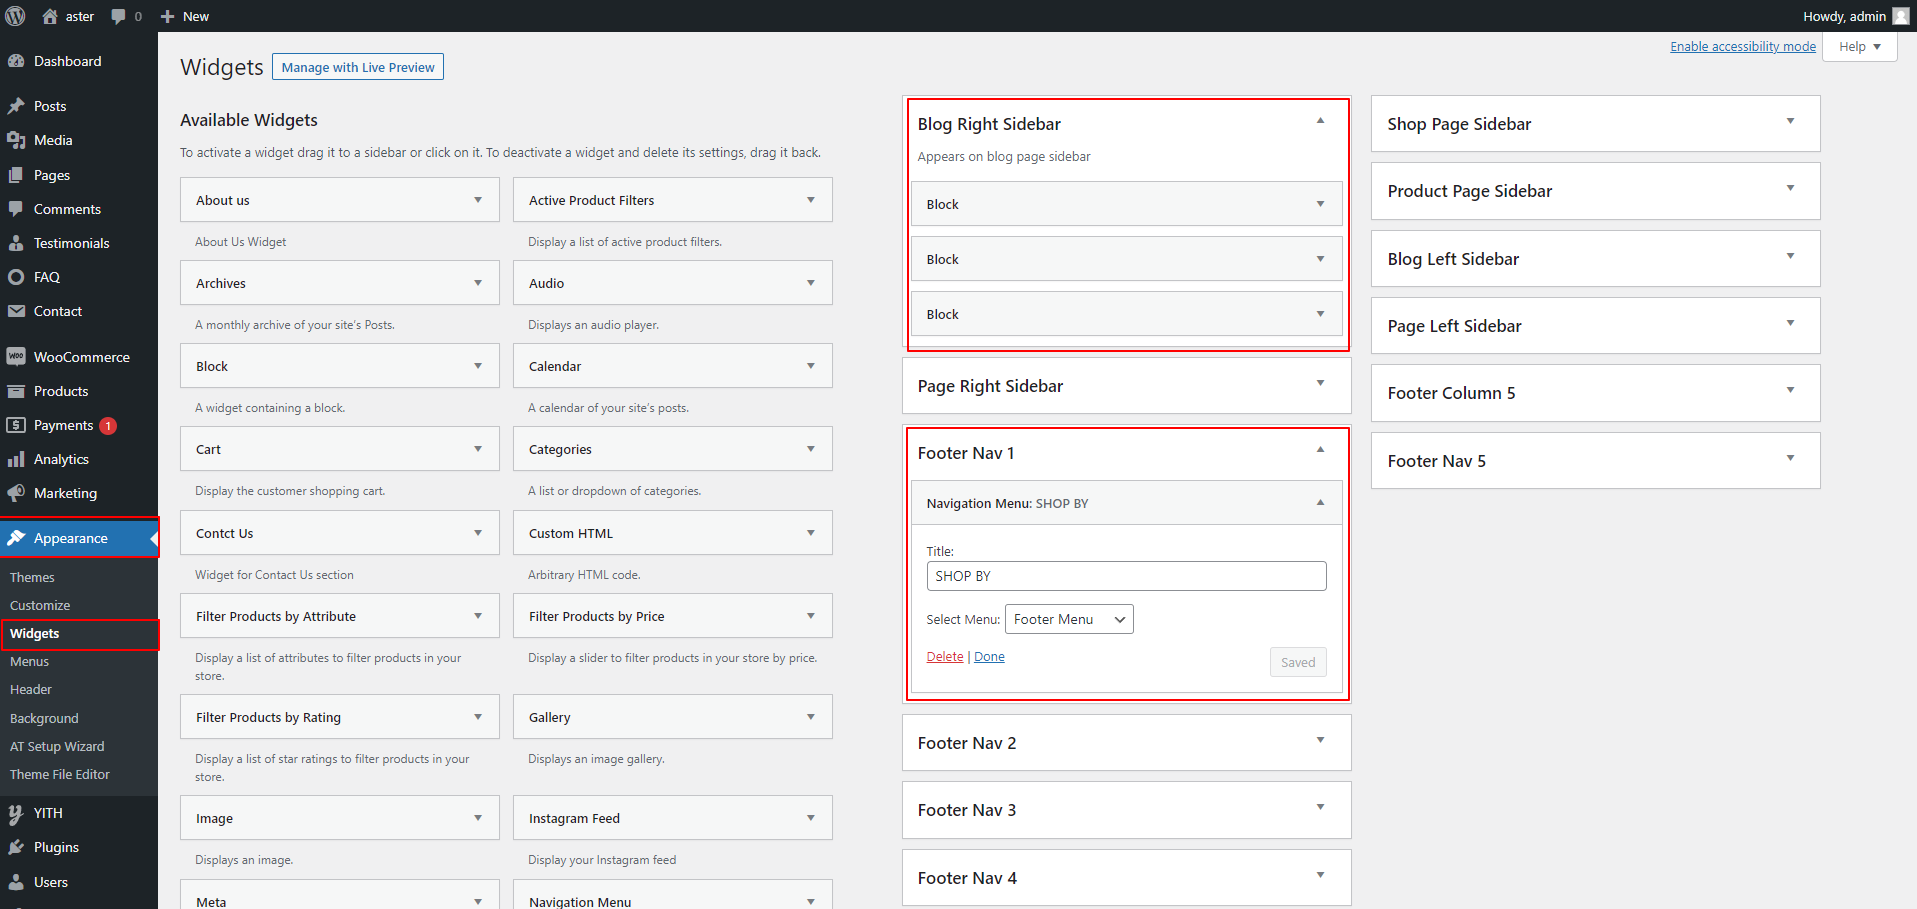
Widgets
In WordPress, widgets are small blocks of content or functionality that you can easily add to various widget areas on your website. Widget areas are predefined sections of your theme's layout, such as the sidebar, footer, or header, where you can place widgets. Widgets allow you to add dynamic content, such as recent posts, search bar, social media links, and more, without writing any code.
- Go to Dashboard > Appearance on the left sidebar, and then click on Widgets.
- On the left side of the Widgets page, you'll see a list of available widgets, such as Recent Posts , Categories , Search , Text, etc.
- you'll find the widget areas available in your theme, such as Sidebar , Footer , Header and any other custom widget areas your theme may have.